


IPL T SF24 and IPL T SFI244 • Connection and Configuration
Connection and Configuration, cont’d
IPL T SF24 and SFI244
4
Chapter Four
Communication and Control
Ports Overview
Communication with the Interface
Programmer’s Guide for the Telnet and Web Browser
Customization
A/V Device Control
Troubleshooting
3-8
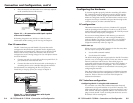
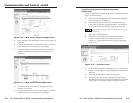
4. Select Internet Protocol (TCP/IP) from the list and click on
Properties. (If you are using Windows 2000, right click Local
Area Connection and select Properties from the menu, then
select Internet Protocol (TCP/IP) from the list and click on
Properties again.) If Internet Protocol (TCP/IP) is not on
the list, it must be added (installed). Refer to your
Windows user’s manual or the online Help system for
information on how to install the TCP/IP protocol.
5. Write down your current IP address and Subnet Mask
below. If your PC is set to “Obtain an IP address
automatically,” make a note of that, instead.
IP Address:
. . .
Subnet Mask:
. . .
6. Click on “Specify an IP address” or “Use the following IP
address” (depending on your operating system), and leave
the default gateway blank. Enter the following values:
IP address: 192.168.254.253
Subnet mask: 255.255.0.0
7. Save the changes and exit the Network setup. Reboot the
PC, if required, for the changes to become effective.
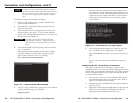
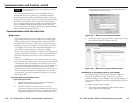
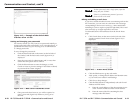
8. Launch your Web browser (Netscape Navigator or Internet
Explorer), and type “http://192.168.254.254/index.html”
in the address box. The IPL T default Web page will be
displayed. Refer to IPL T interface configuration, in this
chapter, for information on configuring your unit.
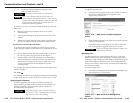
9. After configuring your IPL T interface, repeat steps 3 and 4
and change your TCP/IP settings back to their original
configuration.
Firmware upgrades
Firmware upgrades will become available periodically, as
improvements are made to the versatility and functionality of
the IPL T interface. These upgrades will be available for
download from the Extron Web site. For information on
upgrading the firmware, see Upgrading the firmware in chapter 4.