


SK-91F467-FLEXRAY V1.1
Getting Started
FMEMCU-UG-910017-11 - 52 - © Fujitsu Microelectronics Europe GmbH
5.3 Softune Workbench Monitor Debugger
5.3.1 General Description
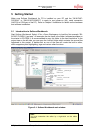
Whenever you have created a valid load module successfully, you can switch from the
development mode to the debugging mode of Softune Workbench.
Basically, there are 3 types of debugging systems supported :
1. The software simulator: This type of debugger is always present and does not
require any special hardware extensions. The simulator will cover the FR-core
features, but no peripheral functions. Therefore, you can use the simulator to
verify program flow, check for dynamic errors, look at the generated assembler
code , etc. .
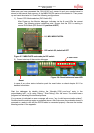
2. The monitor debugger: This debugger type requires an evaluation board like the
“SK-91F467-FLEXRAY” connected to one of the COM-ports of your PC.
Therefore, make sure the evaluation board connected and powered-up as
described before. Explanations in this manual refer to the monitor debugger only.
3. The emulator debugger: The in-circuit-emulator (ICE) is a system, which allows a
connection to any target system using a probe-cable. The appropriate system for
the MB91F467DA series is the MB2198-01 system. More information about this
system can be found on Fujitsu's website.
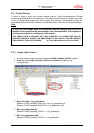
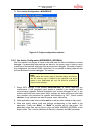
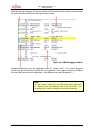
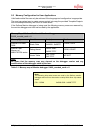
Which debugger is used for the actual project can be configured in the project tree as shown
below or in the “Project – Setup Project – Debug” menu. The current selection is blue
marked (icon):
The default settings for the monitor debugger are: COM-Port 1, 57K6 baud, 8N1. If you wish
to change the COM-port, please right-click on the “Mondeb_57K6_com1.sup” entry and
select change.
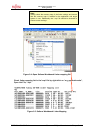
If these settings are correct, start your debugging session:
Note:
It is not possible to use the Softune Workbench monitor debugger
with this configuration because no code can be debugged which is
located in internal Flash. Also this configuration does not support
special debugger settings, which are disabled for this
c
onfiguration.
Note:
If you change the baud rate or use a different crystal frequency,
you have to change the UART-settings in the debugging kernel
source project, re-compile and flash the new kernel to your “SK-
91F467-xxx” board first. The project can be found in
Software\SWBMonitorDebugger. All settings are done in the
module u_io.asm.