


750C Plus
Full menu mode
Default: Auto
Device setup
Sharp lines
5-14
Company confidential. Murillo/Ravillo User’s Guide. Final Freeze Status: Frozen
This is the cyan on page 5-14 (seq: 130)
This is the black on page 5-14 (seq: 130)
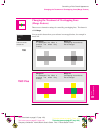
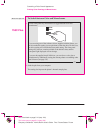
Improving Line Quality and Graphics Detail
The Sharp lines option refines the print quality of line drawings by smoothing the
fine gradations along the angles and curves of the printed image. This
enhancement produces:
Crisper lines.
Finer detail.
Line drawings with a ‘sharp’ appearance.
Only plots that have color content are affected by the
Sharp lines option to produce
addressable 600 dpi resolution. Monochrome images are not affected by the
Sharp
lines
option as these are produced in true 300 or 600 dpi resolution, depending on
the print quality that you have selected.
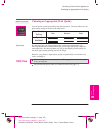
The
Sharp lines option has has three settings, Auto, Off and On, and can be set
either through the front-panel menu or HP supported Windows drivers
. The
factory default setting is Auto
.
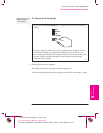
With Sharp lines set to Auto you will always get best quality color plots, except
when you send the following files:
Mixed lines and scanned color images.
Mixed lines and color photographs.
CorelDRAW! (with color images).
For these files it is recommended that the
Sharp lines default setting is changed,
depending on your preference for image or line quality:
Select On if you have a file which contains line and color images and you want
the lines to be plotted in Best quality, even if there is possible degradation to the
quality of the color image.
Select Off if you have a file which contains line and color images and you want
to optimize the quality of the color images.
Select Off if the plot is a complex vector file, such as a CorelDRAW! The plot
quality will be optimized for these circumstances.
Select Off if the output speed of the plotter is more important than Best quality.
Controlling a Plot’s Overall Appearance
Choosing an Appropriate Print Quality