


To print an index sheet
1. Insert a memory card into the appropriate slot on the device.
2. Press the Photo button.
3. Press the right arrow key repeatedly to select Index Sheet.
4. Press OK.
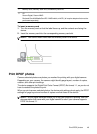
Save photos to your computer
After you take photos with your digital camera, you can print them immediately or save
them to your computer. To save the photos to your computer, remove the memory card
from your digital camera and insert it in the appropriate memory card slot on the device.
To save photos
NOTE: Use these instructions only when you are using a network connection. If you
are using a USB connection, then a dialog box will automatically appear on the
computer when you insert the memory card in the device.
1. Insert a memory card into the appropriate slot on the device.
The Photo menu opens automatically.
2. Press the arrow keys and select Yes, and then press OK to select it.
3. Press the arrow keys and select Transfer To:, and then select the name of your
computer.
4. Follow the onscreen prompts on your computer to save the photos to your computer.
Use Photo Fix tools
When turned on, Photo Fix applies the following technologies to all the photos printed
from a memory card.
NOTE: The default state for this feature is On
• Photo Brightening
• Adaptive Lighting enhances the contrast to make printed images appear better. This
enhancement can make dark images appear brighter.
• Smart Focus sharpens the image to make it appear sharper.
To turn on Photo Fix
1. Insert your memory card into the appropriate slot on the device.
2. When prompted, press the Photo button repeatedly until the Photo Fix is displayed.
3. Press
to select On, and then press OK.
Use Red Eye Removal
Use this function to remove red eye from photos that you print from a memory card.
NOTE: The default state for this feature is On
Use Red Eye Removal 51