


Removal and Replacement of Parts (with Calibration) 10-29
Replacement of Parts
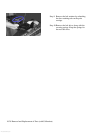
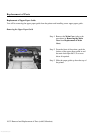
Installing the Belt Drive
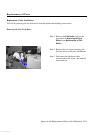
Step 1. Place the belt drive into the print carriage, aligning the indicator tab correctly. Carefully place the
securing springs.
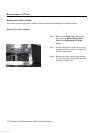
Step 2. Replace belt retainer, ensuring that all four retaining tabs snap into position.
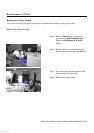
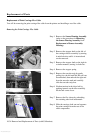
Step 3. Slide the carriage shaft back onto the carriage chassis assembly.
Step 4. Reattach the flex clamp.
Step 5. Replace the drive belt by first looping the belt drive on the right around the drive motor axle,
then tighten the slack on the right by sliding the idler assembly inwards till the belt loops around
it.
Step 6. Replace the encoder strip, taking care not to touch the encoded portion of the strip itself, by
hooking it on the right encoder snub, then carefully sliding it through the print carriage
mechanism and latching it taut on the left.
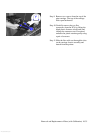
Step 7. Reattach the stopper spring.
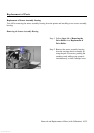
Step 8. Replace the left stopper shaft by placing it into the socket inverted, then rotating it clockwise till
it snaps into position.
Step 9. Repeat the same for the right stopper shaft, rotating it anticlockwise into position.
Step 10. Replace the remaining components for the Sensor Assembly Housing (refer to the procedures in
Installing the Sensor Assembly Housing from Replacement of Sensor Assembly Housing).
www.GovTechMedia.com