


Removal and Replacement of Parts (with Calibration) 10-31
Replacement of Parts
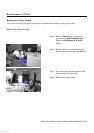
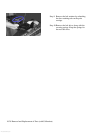
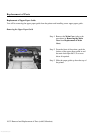
Installing the Idler Assembly
Step 1. Replace the new idler assembly by sliding the unit into the groove from the left, then push the
right lever inwards till it springs into position.
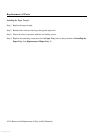
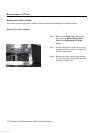
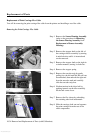
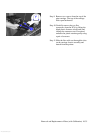
Step 2. Replace the drive belt by first looping the belt drive on the right around the drive motor axle,
then tighten the slack on the right by sliding the idler assembly lever inwards till the belt loops
around it.
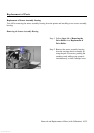
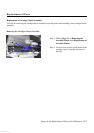
Step 3. Replace the remaining components for the Main Case (refer to the procedures in Installing the
Main Case from Replacement of Main Case).
www.GovTechMedia.com