


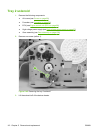
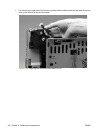
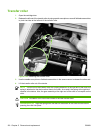
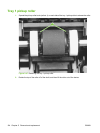
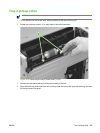


Transfer roller
1. Open the cartridge door.
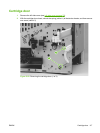
2. Release the left end of the transfer roller by using needle-nose pliers or a small flatblade screwdriver
to pinch two tabs at the left end of the transfer roller.
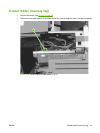
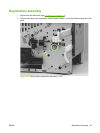
Figure 5-53 Removing the transfer roller
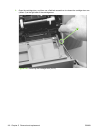
3. Use the needle-nose pliers or flatblade screwdriver in the same manner to release the other end.
4. Lift the transfer roller out of the device.
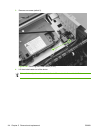
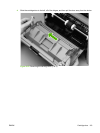
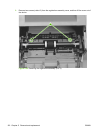
NOTE The left end of the transfer roller has a spring attached. At the right end of the roller, the
spring is attached to the device rather than to the roller. As a result, the spring at the right end
remains in the device. Also, the gear assembly at the right end of the roller is not captive on the
roller.
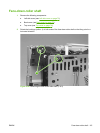
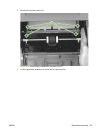
CAUTION Be careful not to touch the surface of the new transfer roller.
Reinstallation tip Align the springs with the tabs on the bottom of the roller-mounts before
pressing the roller into place.
120 Chapter 5 Removal and replacement ENWW