


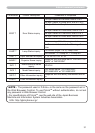


8
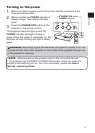
Connecting power supply
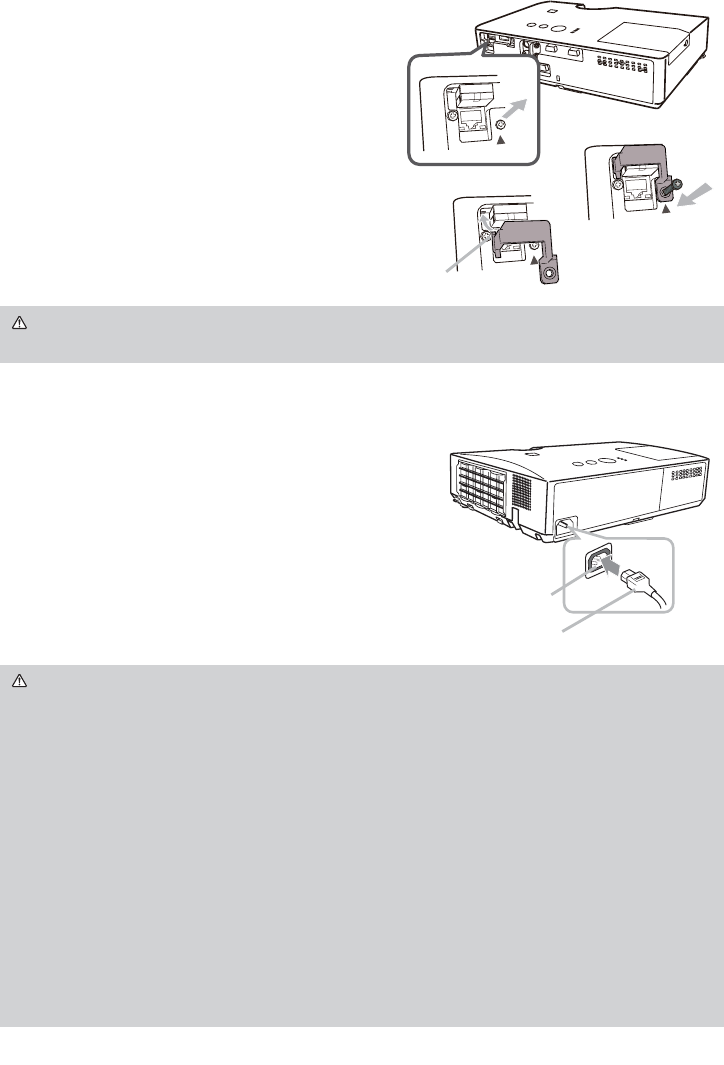
1.
Put the connector of the power cord into the
AC IN (AC inlet) of the projector.
2.
Firmly plug the power cord’s plug into the
outlet. In a couple of seconds after the power
supply connection, the POWER indicator will
light up in steady orange.
Please remember that when the DIRECT POWER
ON function activated, the connection of the power
supply make the projector turn on.
WARNING ►Please use extra caution when connecting the power cord, as
incorrect or faulty connections may result in re and/or electrical shock.
• Do not touch the power cord with a wet hand.
• Only use the power cord that came with the projector. If it is damaged, consult
your dealer to get a new one. Never modify the power cord.
• Only plug the power cord into an outlet whose voltage is matched to the power
cord. The power outlet should be close to the projector and easily accessible.
Remove the power cord for complete separation.
• Do not distribute the power supply to multiple devices. Doing so may overload
the outlet and connectors, loosen the connection, or result in re, electric
shock or other accidents.
• Connect the ground terminal for the AC inlet of this unit to the ground terminal
of the building using an appropriate power cord (bundled).
NOTICE ►This product is also designed for IT power systems with a phase-
to-phase voltage of 220 to 240 V.
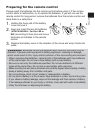
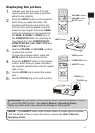
Fastening the adapter cover
Use the supplied adapter cover to prevent the
USB wireless adapter from coming off easily.
1.
Loosen the screw (marked with triangle)
on the bottom right of the USB TYPE A
port.
2.
Insert the tab of the cover into the hole
at the upper left of the USB TYPE A
port in the direction of the arrow.
3.
Align the screw holes on the projector
and the cover. Then insert the screw
removed from the projector into the hole
and tighten the screw.
WARNING ►Keep small parts away from children and pets. Take care not
to put in the mouth.
AC IN
Power cord
Tab
2
3
1