


14 - 14
Using a Passive Vehicle Cradle
Introduction
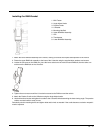
Note: The protective boot or carrying case (if used) must be removed before inserting the MX7 Tecton into a securely
mounted passive vehicle cradle.
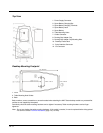
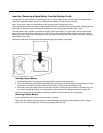
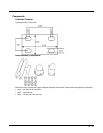
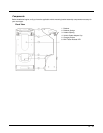
The MX7 Tecton passive vehicle cradle consists of:
• Cradle bracket
• U-bracket
• 2 knobs
• Hook and loop fabric to secure the MX7 Tecton
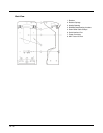
An optional RAM assembly consists of:
• RAM ball base for vehicle mount
•RAM arm
• RAM base to attach U-bracket
• 4 each: bolts, nuts and washers
The installer must supply hardware to attach either the U-bracket or the RAM ball base to the vehicle.
Communications cables for the MX7 Tecton are available separately.
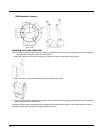
Wireless communication is available as long as the MX7 Tecton has sufficient energy in the main battery pack and a clear
signal path. The passive vehicle cradle is lined with strips of hook-and-loop fabric to ensure a snug fit between the MX7
Tecton and the inside of the cradle. The cradle can secure the MX7 Tecton with or without a trigger or handstrap. The MX7
Tecton passive vehicle cradle does not have power, MX7 Tecton serial or input/output connectors.
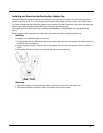
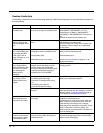
There are two mounting options for the cradle:
• U-bracket mounting. See Installing the Cradle U-Bracket (page 14-16).
• RAM ball Arm mounting. See Installing the RAM Bracket (page 14-17).
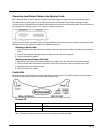
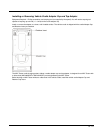
Quick Start
The following list outlines, in a general way, the process to follow when preparing the MX7 Tecton passive vehicle cradle for
use. Refer to the following sections for more details.
1. Attach the RAM bracket or U-bracket mounting device to the vehicle.
2. Attach the MX7 Tecton passive cradle to the vehicle mounted bracket using the Angle Adjust knobs.
3. Adjust the cradle to the best viewing angle using the Angle Adjust knobs.