


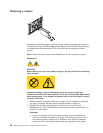
Statement 8:
CAUTION:
Never remove the cover on a power supply or any part that has the following
label attached.
Hazardous voltage, current, and energy levels are present inside any
component that has this label attached. There are no serviceable parts inside
these components. If you suspect a problem with one of these parts, contact
a service technician.
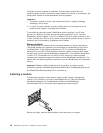
Complete the following steps to install a module:
Note: These instructions assume the BladeCenter unit is connected to power.
1. Read the safety information beginning on page vii and “Installation guidelines”
on page 13 through “Handling static-sensitive devices” on page 14.
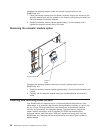
2. Remove the acoustic module option, if installed, from the rear of the
BladeCenter unit. See “Installing and removing the acoustic module option” on
page 21 for instructions.
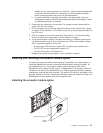
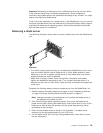
3. Remove the filler module from the bay.
4. Ensure that the release lever on the module is in the open position
(perpendicular to the module).
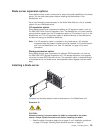
5. Slide the module into the appropriate module bay until it stops.
6. Push the release lever on the front of the module closed.
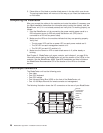
7. Attach any cables or cords required by the module. See “Input/output
connectors” on page 26 for the location of connectors on the BladeCenter unit.
Be sure to route the power cord on a power module through the strain-relief
clamp on the power module.
8. Make sure the LEDs on the module indicate that it is operating properly. Verify
that:
v The dc power LED and the ac power LED on each power module are lit.
v The OK LED on the management module is lit.
v The OK LED on each I/O module is lit.
9. If you have other modules to install, do so now; otherwise, go to step 10.
10. Replace the acoustic module option, if you removed it in step 2.
Chapter 2. Installing options 19