5. Place either a filler blade or another blade server in the bay within one minute.
The spring-loaded doors will move out of the way as you insert the blade server
or filler blade.
Completing the installation
After you connect the cables to the modules and route the cables (if necessary, see
the Rack Installation Instructions for information about routing the cables), start the
BladeCenter unit (if it is not already started) and verify that it is working properly, as
follows:
1. Start the BladeCenter unit by connecting the power-module power cords to a
220-volt power source (a 220-volt power distribution unit (PDU) that is
connected to a 220-volt ac power outlet).
2. Make sure the LEDs on the modules indicate that they are operating properly.
Verify that:
v The dc power LED and the ac power LED on each power module are lit.
v The OK LED on each management module is lit.
v The OK LED on each I/O module is lit.
3. Make sure the Power-on LED on each blade server is lit, either steady or
blinking.
See Chapter 3, “BladeCenter unit power, controls, and indicators”, on page 29 for
information about starting the BladeCenter unit and the location of the LEDs on the
modules. See the BladeCenter HS20 Type 8678 Installation and User’s Guide on
the BladeCenter Documentation CD for the location of the LEDs on the blade
servers.
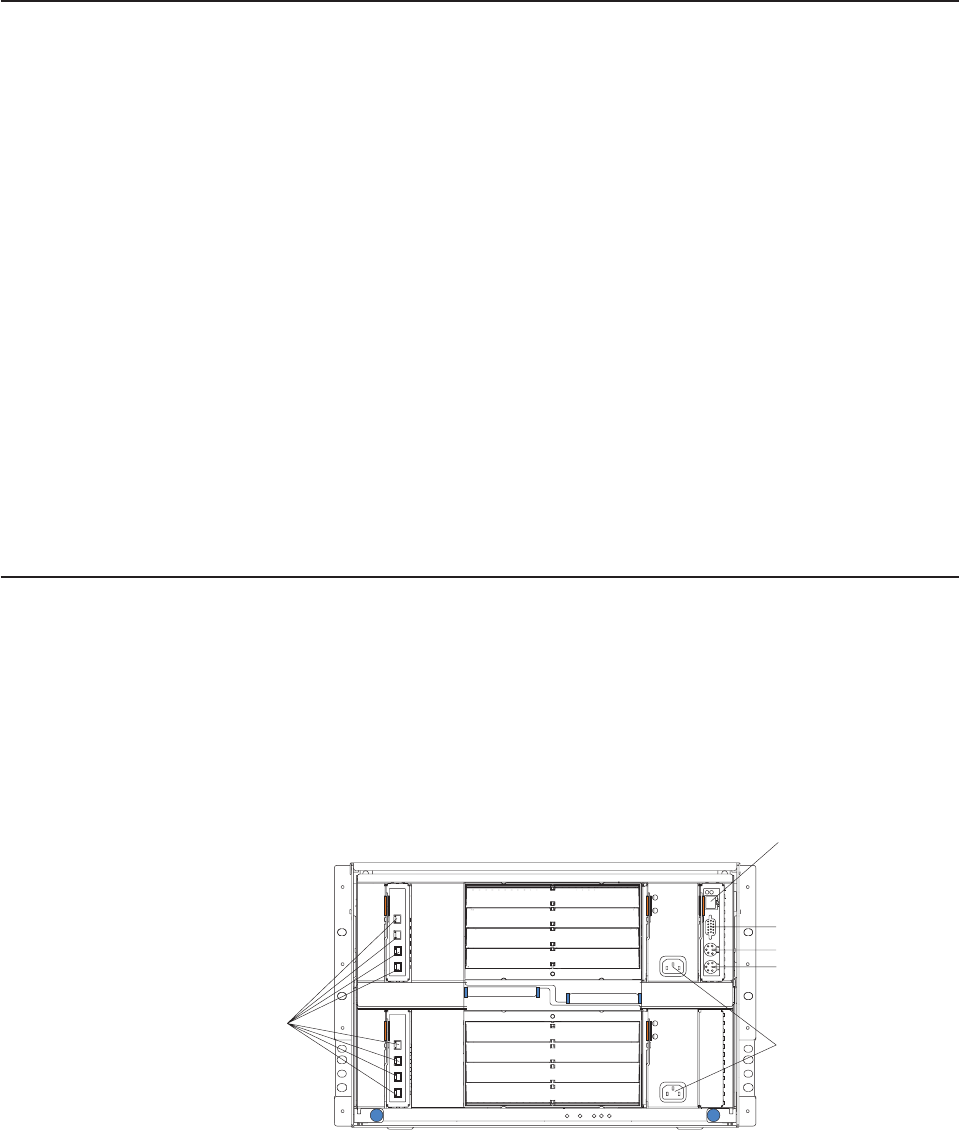
Input/output connectors
The BladeCenter unit has the following ports:
v One video
v One PS/2 keyboard
v One PS/2 mouse
v One Universal Serial Bus (USB) on the front of the BladeCenter unit
v One 10/100 Mbps Ethernet for remote console and management
The following illustration shows the I/O connectors on the rear of your BladeCenter.
AC
AC
DC
DC
I/O module
Remote
management
and console
(Ethernet)
Video
Keyboard
Mouse
AC power
(220 volts)
26 BladeCenter Type 8677: Installation and User’s Guide


