PX875P PRO/ PX875P
58
Appendix III: Installing a Windows
®
OS
to the SATA HDD
Please refer to the steps below to install a windo
®
ws OS to the SATA HDD
A Port1 Mode” option is
ou need to set either Port0 or
ce has been
®
OS.
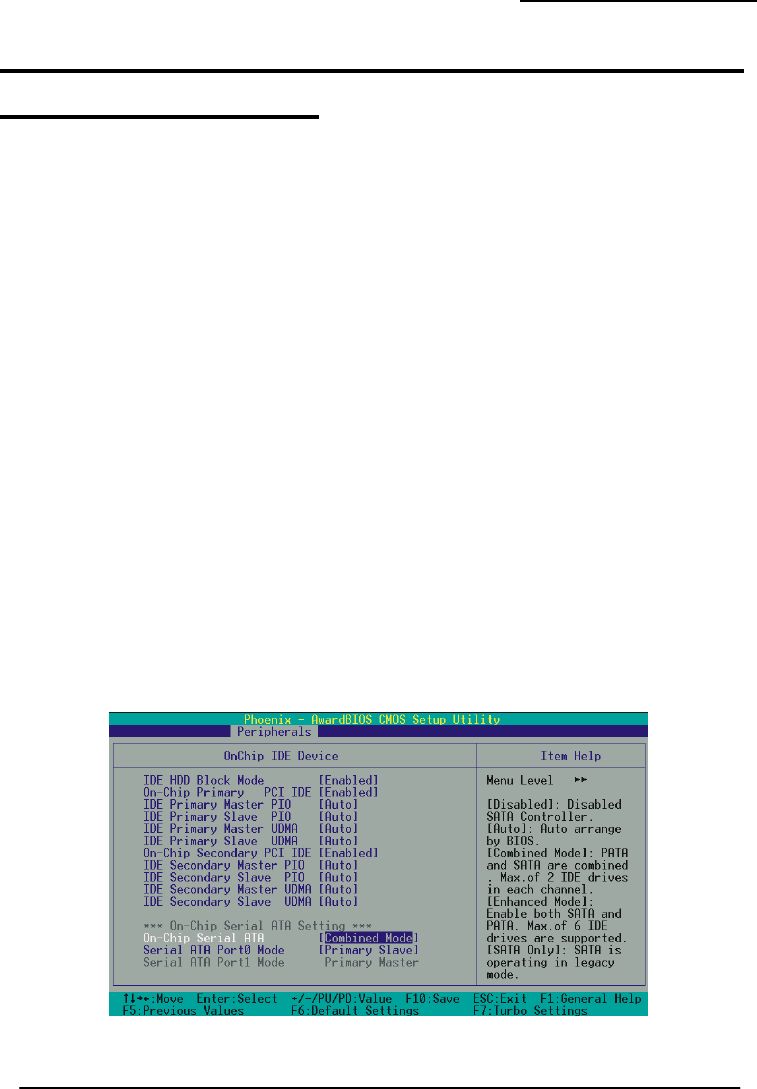
1. Make sure that the “On-Chip Serial ATA” option is set to “ Combined Mode ” in the BIOS
Setup Utility.
BIOS Setup Utility -> Integrated
Peripherals Æ OnChip IDE Device Æ On-Chip Serial
ATA Æ “Combined Mode”
2. Make sure that either the “Serial ATA Port0 Mode” or “Serial AT
set to “Primary Master” in the BIOS Setup Utility. Note that y
Port1 depending on which SATA drive you are installing the OS to.
BIOS Setup Utility -> Integrated Peripherals Æ OnChip IDE Device Æ Serial ATA
Port0/1 Mode Æ “Primary Master”
3. Save all BIOS configurations and exit the BIOS setup utility.
4. Place the Windows
®
98/Me/2000/XP CD into the CD-ROM drive to begin the OS
installation process. During the installation you will see that the SATA devi
assigned to the C: drive. Continue and complete the installation of the Windows
5. If you are installing Windows
®
XP, you must now set the“On-Chip Serial ATA"option to
“Auto"or“Enhanced Mode"in the BIOS Setup Utility in order for all of the SATA and
IDE devices to be visible.
BIOS Setup Utility -> Integrated
Peripherals Æ OnChip IDE Device Æ On-Chip Serial
ATA Æ “Enhanced Mode” or “Auto”


