Using the printer dock plus with a computer
www.kodak.com/go/support
29
Transferring pictures from a PictBridge
compatible device
1 Make sure Kodak EasyShare software is installed (see page 22) and the
printer dock is connected to your computer (see page 25).
2 Open the accessory door on the printer dock.
3 If a Kodak EasyShare camera is docked, remove it. If there is a memory card
in the SD/MMC card slot, remove it as well.
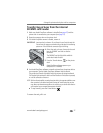
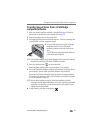
4 Plug the USB connector from the PictBridge
compatible device into the USB device
connector located on the side of the printer
dock.
The USB device connector light blinks while the
printer dock reads the device.
NOTE: If the PictBridge compatible device is already plugged in but the connection has timed-out,
disconnect then reconnect the USB cable to re-establish a connection.
5 Press the Transfer button, , on the printer dock.
Kodak EasyShare software opens on your computer (if it is installed).
6 Use Kodak EasyShare software to transfer pictures from the printer dock to
your computer. See the Kodak EasyShare software Help for details.
The printer dock Transfer light blinks while the pictures are being transferred.
The Transfer light continues to blink until the Transfer or Print button is pressed,
or until the connection times-out.
NOTE: With the software installed, pressing the Transfer button establishes a new drive
connection for the PictBridge compatible device. You can view, copy, delete, and otherwise
manage files on the new drive, as you do with other drives on your computer. See your
computer documentation for details.
■ To stop transfer, press the Cancel button, .


