8
About the Network Scanner Driver
8-6 bizhub PRO 1050/1050e Scanner
About the Network Scanner Driver Chapter 8
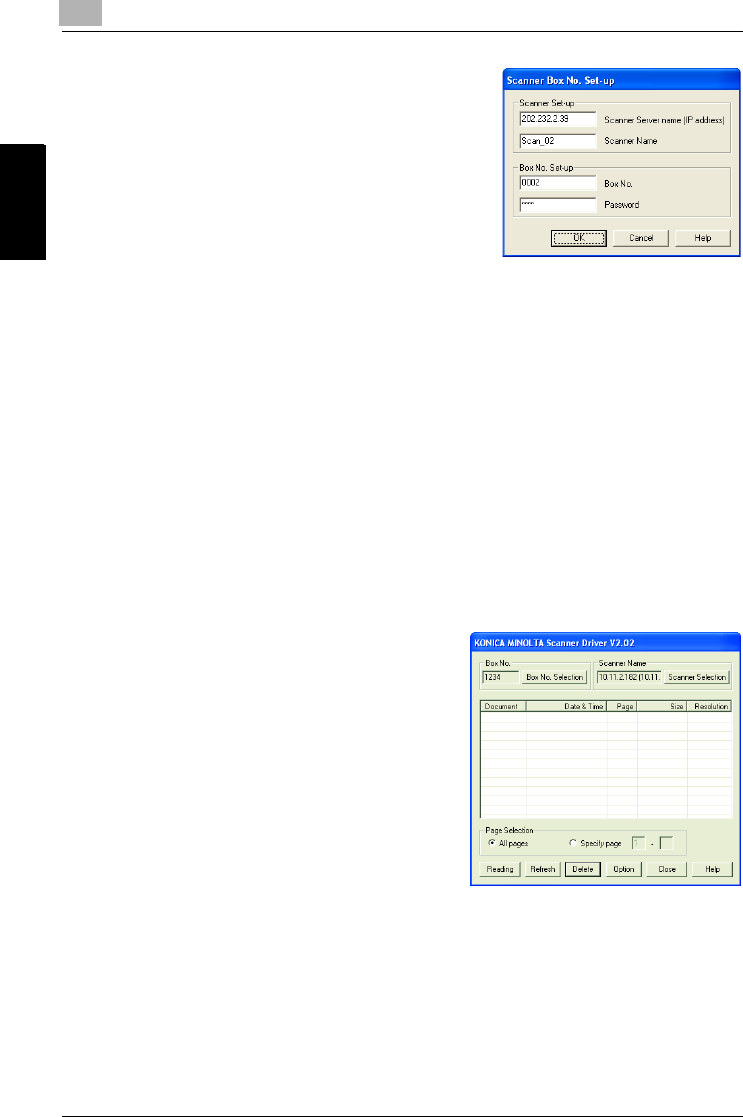
4 In the [Scanner Box No. Set-up] win-
dow, input a [Scanner Server name (IP
address)] to which you connect, a
[Scanner Name] for identification by
the driver, a [Box No.] specified when
an original was scanned, a [Password]
configured for the Box No., and click
the [OK]. Go to the step 6.
– Once you configure the scanner
settings, this window does not appear the next time.The [Scanner
Selection] window (step 5) appears.
– To scan with another scanner, click the [Add] in the [Scanner Selec-
tion] window.
– For a Scanner Server name (IP address), input the IP address of the
print controller. For more information, contact your administrator.
– You cannot use a DNS name or a NetBIOS name for a Scanner
Server name (IP address).
– Multiple computers cannot access to one box simultaneously.
– At maximum, 5 computers can connect to one scanner simultane-
ously.
The [KONICA MINOLTA Scanner Driver] window appears.
5 In the [Scanner Selection] window, select the [Box No.] in which the
scanned data you import are stored, and click the [Connect].
6 Select a file from the file list shown
in the [KONICA MINOLTA Scanner
Driver] window, then click the
[Reading] to allow the selected file
to be read in.
– By default, the file is cleared
from the HDD-B immediately
after the file is fully read in. If
you want, you can override this
default setting so that the file is
held in the hard disk.
– Refer to "Features and Set-
tings of the Network Scanner Driver" on Page 8-8 about the set-
tings.
– Refer to "Deleting images stored on the HDD-B" on Page 8-7 about
how to delete scanned data.
– Only data for which TIFF was selected as the file form is displayed.
The selected file is read from the HDD-B.


