Initial Configuration
2-8
2
To configure a community string, complete the following steps:
1. From the Privileged Exec level global configuration mode prompt, type
“snmp-server community string mode,” where “string” is the community access
string and “mode” is rw (read/write) or ro (read only). Press <Enter>. (Note that
the default mode is read only.)
2. To remove an existing string, simply type “no snmp-server community string,”
where “string” is the community access string to remove. Press <Enter>.
Trap Receivers
You can also specify SNMP stations that are to receive traps from the switch.
To configure a trap receiver, complete the following steps:
1. From the Privileged Exec level global configuration mode prompt, type
“snmp-server host host-address community-string,” where “host-address” is the
IP address for the trap receiver and “community-string” is the string associated
with that host. Press <Enter>.
2. In order to configure the switch to send SNMP notifications, you must enter at
least one snmp-server enable traps command. Type “snmp-server enable traps
type,” where “type” is either authentication or link-up-down. Press <Enter>.
Saving Configuration Settings
Configuration commands only modify the running configuration file and are not
saved when the switch is rebooted. To save all your configuration changes in
nonvolatile storage, you must copy the running configuration file to the start-up
configuration file using the “copy” command.
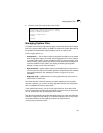
To save the current configuration settings, enter the following command:
1. From the Privileged Exec mode prompt, type “copy running-config
startup-config” and press <Enter>.
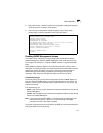
Console(config)#snmp-server community admin rw
Console(config)#snmp-server community private
Console(config)#
Console(config)#snmp-server enable traps link-up-down
Console(config)#


