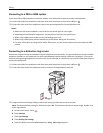
6 Assign a shortcut number.
If you enter a number that is already in use, then you are prompted to select another number.
7 Click Add.
Creating a fax destination shortcut using the touch screen
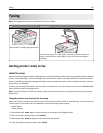
1 Load an original document faceup, short edge first into the ADF or facedown on the scanner glass.
Note: Do not load postcards, photos, small items, transparencies, photo paper, or thin media (such as magazine
clippings) into the ADF. Place these items on the scanner glass.
2 If you are loading a document into the ADF, then adjust the paper guides.
3 On the home screen, touch Fax.
4 Enter the fax number.
To create a group of fax numbers, touch Next number, and then enter the next fax number.
5 Touch Save as Shortcut.
6 Enter a name for the shortcut.
7 Touch OK.
8 Touch Fax It to send the fax, or touch to return to the home screen.
Changing the fax destination shortcut using the Embedded Web Server
1 Type the printer IP address into the address field of your Web browser.
Note: If you do not know the IP address of the printer, then print a network setup page and locate the IP
address in the TCP/IP section.
2 Click Settings.
3 Click Manage Shortcuts.
Note: A password may be required. If you do not have an ID and password, get one from your system support
person.
4 Click Fax Shortcut Setup.
5 Select the list entry, and then update it using the text box.
6 Click Modify.
Faxing 114


