


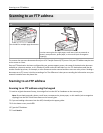

Scanning to an FTP address using a shortcut number
1 Load an original document faceup, short edge first into the ADF or facedown on the scanner glass.
Note: Do not load postcards, photos, small items, transparencies, photo paper, or thin media (such as magazine
clippings) into the ADF. Place these items on the scanner glass.
2 If you are loading a document into the ADF, then adjust the paper guides.
3 Press #, and then enter the FTP shortcut number.
4 Touch Send It.
Scanning to an FTP address using the address book
1 Load an original document faceup, short edge first into the ADF or facedown on the scanner glass.
Note: Do not load postcards, photos, small items, transparencies, photo paper, or thin media (such as magazine
clippings) into the ADF. Place these items on the scanner glass.
2 If you are loading a document into the ADF, adjust the paper guides.
3 On the home screen, touch FTP.
4 Touch Search Address Book.
5 Type the name or part of the name you are searching for, and then touch Search.
6 Touch the name that you want to add to the To: field.
7 Touch Send It.
Creating shortcuts
Instead of entering the entire FTP site address on the control panel each time you want to send a document to an FTP
server, you can create a permanent FTP destination and assign a shortcut number. There are two methods for creating
shortcut numbers: using a computer or using the printer touch screen.
Creating an FTP shortcut using the Embedded Web Server
1 Type the printer IP address into the address field of your Web browser.
Note: If you do not know the IP address of the printer, then print a network setup page and locate the IP
address in the TCP/IP section.
2 Click Settings.
3 Under Other Settings, click Manage Shortcuts.
Note: A password may be required. If you do not have an ID and password, get one from your system support
person.
4 Click FTP Shortcut Setup.
5 Enter the appropriate information into the boxes.
Scanning to an FTP address 123