


39
2. In this example, we'll select
SHALLOW and press ENTER. A small menu
will appear, giving you the option to turn off the alarm or set the depth.
3. Select
SET DEPTH and press ENTER.
4. Use the UP and DOWN keys to select the desired depth and press
ENTER. To set the Deep alarm, press EXIT, select DEEP from the alarms
menu and press the
ENTER key.
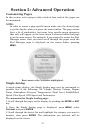
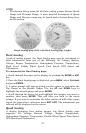
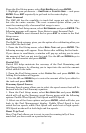
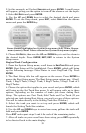
Sonar Alarms highlighted on System Setup menu (left). Sonar Alarms
menu (center); Reset Values selected on System Setup menu (right).
5. Choose SET DEPTH, then use the UP and DOWN keys to set the alarm to
the desired depth. Press
ENTER|EXIT|EXIT to return to the System
Setup menu.
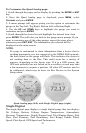
Engine/Tank Configuration
1. From the System Setup menu, scroll down to
ENG/TANK CFG and press
ENTER. Boat Setup will be highlighted. Press ENTER, which will bring
up the following message: Press Enter to reset Eng/Tank Cfg. Press
ENTER.
3. The Boat Setup title bar will appear on the screen. Press
ENTER to
access the Boat Setup menu. The Boat Setup menu options are: 1 Eng/1
Tank, 1 Eng/2 Tank, 2 Eng/1 Tank, 2 Eng/2 Tanks, 3 Eng/1 Tank or 3
Eng/3 Tanks.
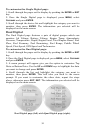
4. Choose the option that applies to your vessel and press
ENTER, which
will bring up the Set Tank Size menu. It will appear with up to three
options, depending on the number of tanks you chose during Boat
Setup. The options are: Port Tank, Stbd Tank and Cen Tank.
(If you
selected one tank during Boat Setup, you won't see any of these options.
You will be taken directly to the Setting Tank Size Window.)
5. Select the tank you want to set up and press
ENTER, which will
launch the Setting Tank Size window.
6. Use the
UP and DOWN keys to enter how many gallons the tank will
hold and press
ENTER.
Press EXIT and repeat steps 3 and 4 for each of the remaining tanks.
7. After all tanks on your vessel have been setup, press EXIT repeatedly
to be directed back to the main display.