


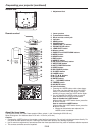


EN-11
Setting up your projector (continued)
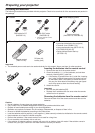
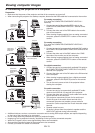
Adjusting the position of the projected image
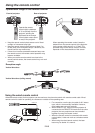
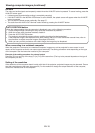
To adjust the positions of the projector and the screen, use LENS SHIFT button.
1. Press the LENS SHIFT button.
• The LENS SHIFT menu appears at the center of the screen.
2. Press the , , or button to move the image position.
• When the button is pressed, the image moves down.
• When the button is pressed, the image moves up.
• When the button is pressed, the image moves to the right.
• When the button is pressed, the image moves to the left.
• WhentheENTERbuttonispressedwhiletheLENSSHIFTmenuisdisplayed,theshiftmodecanbeswitched
between FAST and STEP. When FAST is selected, the lens shifts in a large amount with the , , or button,
and it shifts in a small amount when STEP is selected.
• WhentheLENSSHIFTmenuisdisplayedwhilenovideosignalisinputtotheprojector,acrosshatchappearson
the entire screen.
• Becarefulnottobecaughtintheopeninginthelenswhilethelensismoving.
• Whilethelensshiftisworking,thescreenmayicker.
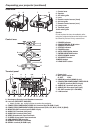
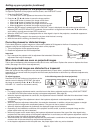
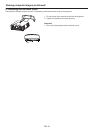
Correcting skewed or distorted image
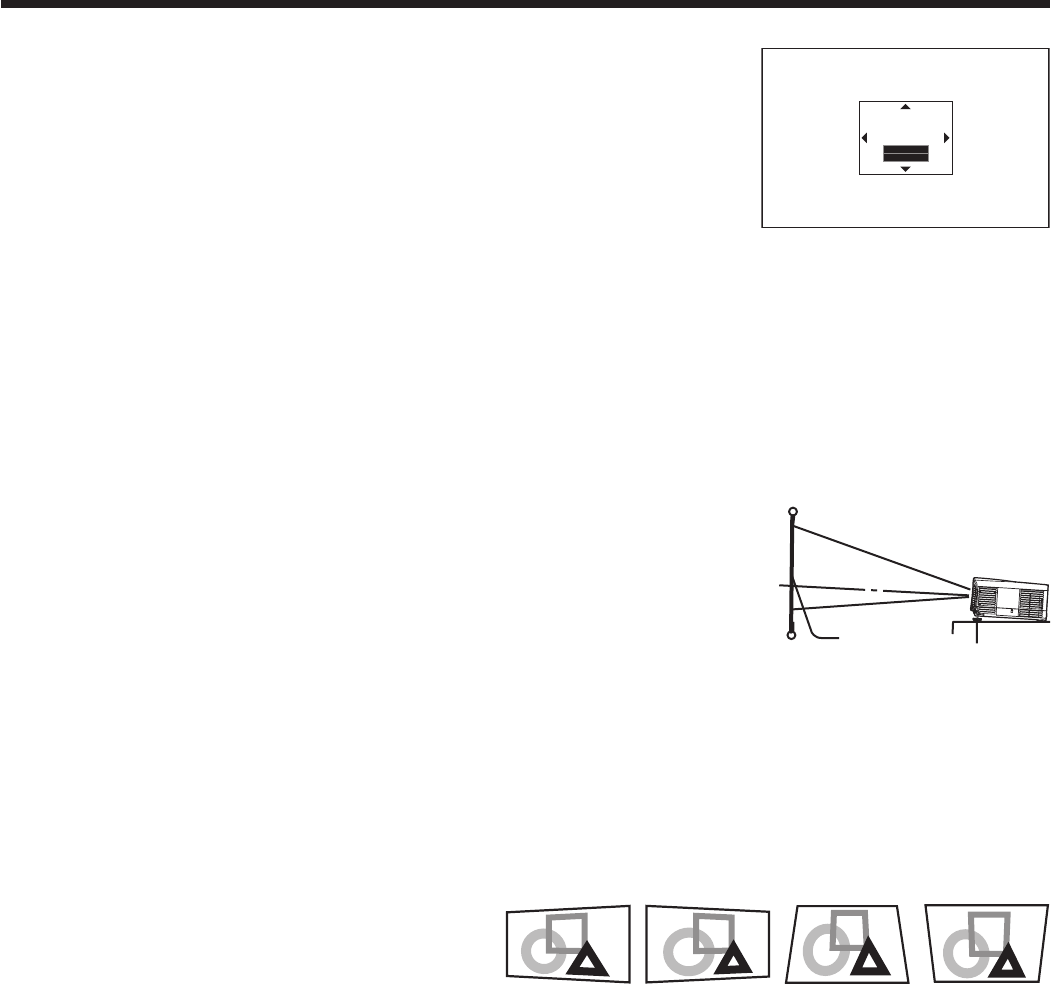
For the best projection, project images on a flat screen installed at 90 degrees to the floor. If necessary, tilt the
projector using the two adjustment feet on the bottom of the projector.
1. Tilt up the projector to the appropriate angle.
2. Rotate the adjustment feet for fine adjustment.
Important:
• Don’ttransporttheprojectorwithitsadjustmentfeetextended.Otherwisethe
adjustment feet may be damaged.
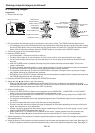
When fine streaks are seen on projected images
This is due to interference with the screen surface and is not a malfunction. Replace the screen or displace the focus
a little. (See page 16 or 23 for focus adjustment.)
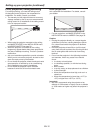
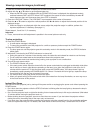
When projected images are distorted to a trapezoid
When the screen and the projector are not placed perpendicularly to each other, projected images become
trapezoidal. If you cannot make the projector and the screen perpendicular to each other by mechanical adjustments,
adjust keystone.
To adjust keystone:
Press the KEYSTONE button on the projector or the
remote control to display KEYSTONE, and adjust
the image by pressing the , , or button (or
VOLUME+or-buttonontheremotecontrol).
LENS
SHIFT
FAST
SELECT:ENTER
Adjustment feet
Screen
In the following cases (for front projection):
Press the
(or -) button.
Press the
(or+)button.
Press the
button.
Press the
button.
Important:
• Forproperkeystoneadjustmentresults,resetthelenstothefactory-adjustedpositionusingLENSSHIFTRESET
in the INSTALLATION menu before carrying out keystone adjustment. (See page 30.)
• When the keystone adjustment is carried out, the adjustment value is indicated. Note that this value doesn’t mean
a projection angle.
• Theallowablerangeoftheadjustmentvalueinthekeystoneadjustmentvariesdependingontheinstallation
conditions.
• Whenthekeystoneadjustmenttakeseffect,theresolutiondecreases.Inaddition,stripesmayappearorstraight
lines may bend in images with complicated patterns. They are not due to product malfunctions.
• Whenthekeystoneadjustmentisperformed,thedisplayedimagemaybedistorted.
• Dependingontheinstallationconditionsoftheprojectorandthescreen,aperfectrectangularimageandthe
proper aspect ratio may not be obtained.
• Noisemayappearonthescreenduringthekeystoneadjustmentbecauseofthetypeofthevideosignalbeing
projected and the setting values of the keystone adjustment. In such cases, set the keystone adjustment values in
the range where the image is displayed without noise.
• Whenhorizontalandverticalkeystoneadjustmentsareperformedincombination,theadjustablerangebecomes
narrower than in the case when they are performed separately.
• Inthekeystoneadjustmentwiththeoptionlens,theproperaspectratiomaynotbeobtained.