


NTI NODEMUX SERIES UNIVERSAL KVM SWITCH
29
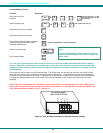
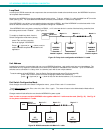
NODEMUX
SWITCH
CPU
(terminal)
RS232
First Unit
RS232 RS232
Second Unit
Last Unit
RS232
Serial Port
Matrix-Y-1
Matrix-Y-1 Matrix-Y-1
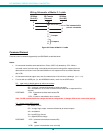
NODEMUX
SWITCH
NODEMUX
SWITCH
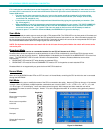
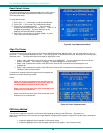
Disable Loopback Disable Loopback Enable Loopback
Loop Back
In order for an RS232 command and a response to the command to be viewed at the terminal screen, the NODEMUX must have
its Loop Back feature enabled.
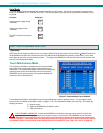
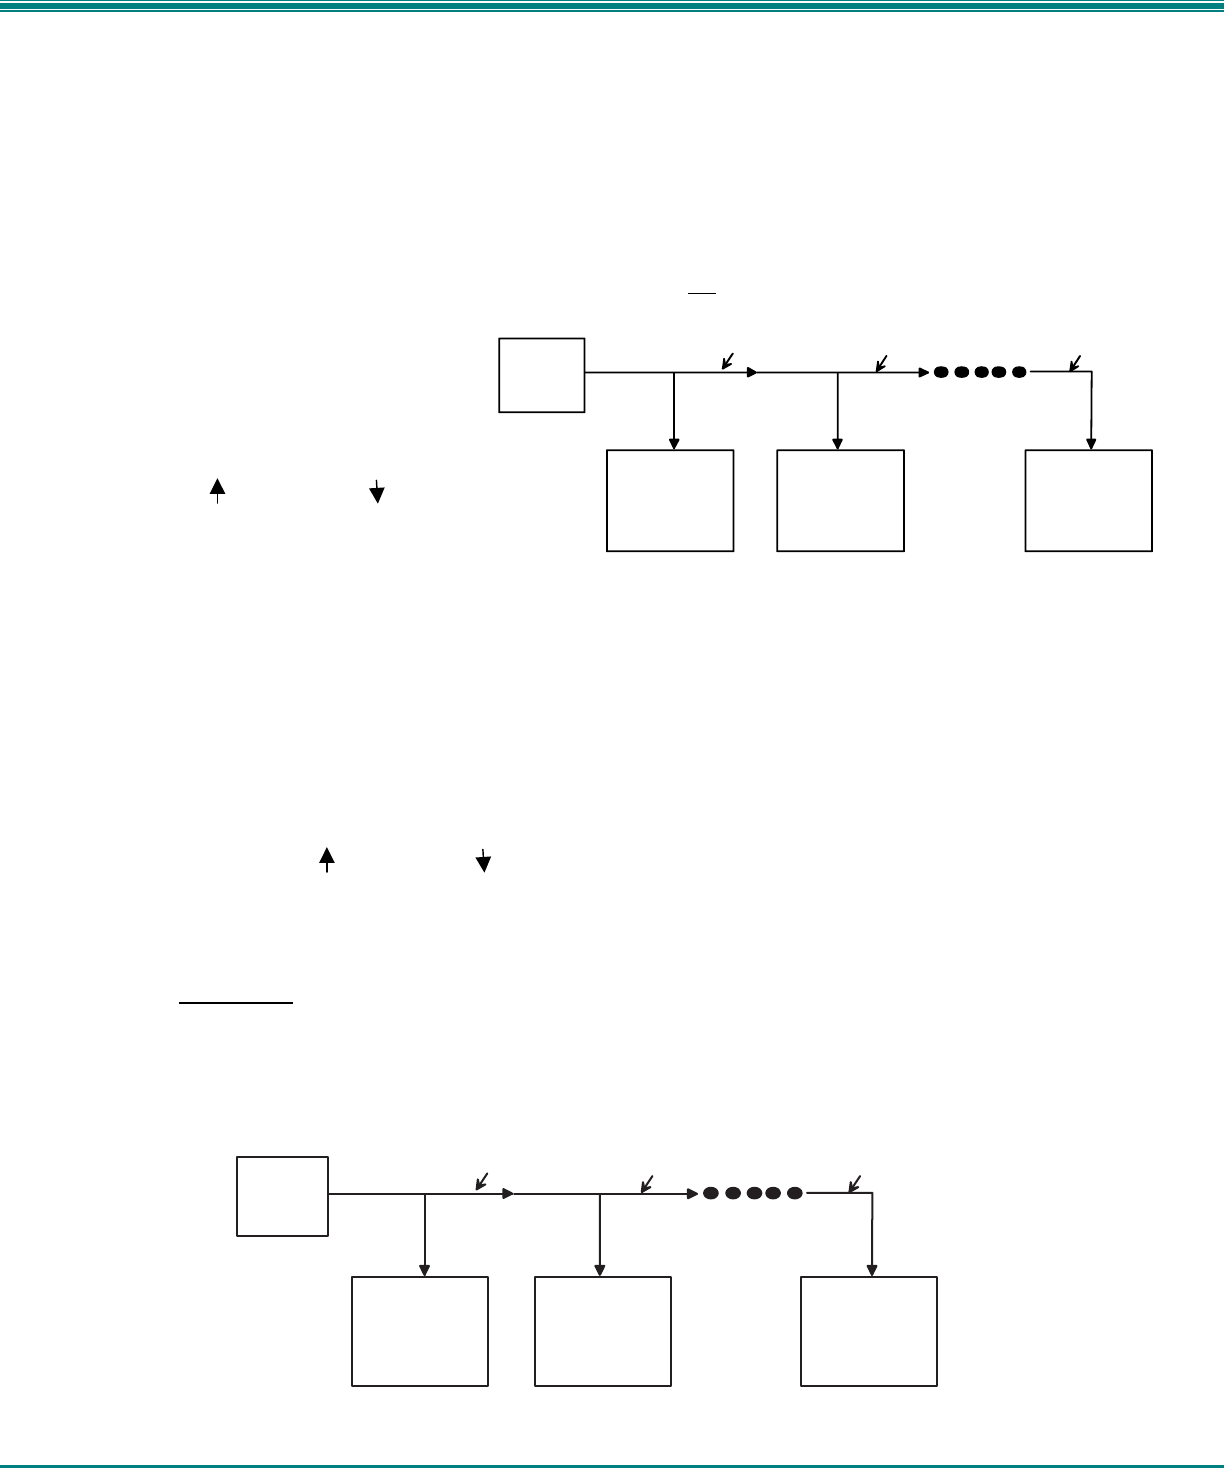
More than one NODEMUX may be connected to a terminal at a time. To do so, a Matrix-Y-1 cable (available from NTI) must be
used. (See Fig. 32). For each additional NODEMUX connected, another Matrix-Y-1 cable will be required.
If the NODEMUX is one of two or more switches being controlled via RS232, and if the NODEMUX is not that last switch in the
series of switches controlled, then this setting should be changed to "DISABLED".
If the NODEMUX is the only device controlled via RS232 , or if it is the last device in a series of devices being controlled, then
this setting should remain "Enabled". (See Figure 32)
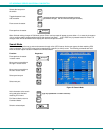
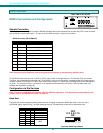
To enable or disable loop back, from the
Switch Configuration mode menu (above),
press <Tab> until the cursor bar
moves to highlight "LOOPBACK".
Press < > (up arrow) or < > (down arrow) to
enable or disable loop back as needed for the
application.
Figure 32- Daisy chain configuration with Matrix-Y-1 cable
Unit Address
In order for a terminal to communicate with one or more NODEMUX switches, each switch must have a unique address. The
NODEMUX will only respond to commands from a terminal if its address is embedded in the command. Up to 15 NODEMUX
switches can be connected in a "daisy chain" to a terminal, each with its own unique address.
To set the address of the NODEMUX, from the Switch Configuration mode menu (Fig. 31 on page 28),
press <Tab> until the cursor bar moves to highlight "RS232 UNIT ADDRESS".
press < > (up arrow) or < > (down arrow) until the desired address (1-15) is selected.
Exit Switch Configuration Mode
Once changes are made to the Switch Configuration menu, press <Enter> and <Y> to save them.
To exit without saving, press <Esc>, then <N>, then <Esc> again. The menu will return to the Administration Mode without
saving the changes made. .
Changes made will take effect the next time the NODEMUX is power cycled.
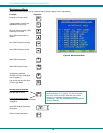
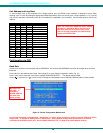
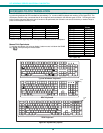
Note: In order to connect multiple NODEMUX units together a Matrix-Y-1 cable must be used. (See Fig. 33.) See Fig. 34
for the pinout of the Matrix-Y-1 cable.
Figure 33- RS232 connection with Matrix-Y-1 cable
N T I
S W I T C H
C P U
R S 2 3 2
F i r s t U n i t
N T I
S W I T C H
R S 2 3 2
N T I
S W I T C H
R S 2 3 2
S e c o n d U n i t
L a s t U n i t
R S 2 3 2
S e r i a l P o r t
M a t r i x - Y - 1
M a t r i x - Y - 1 M a t r i x - Y - 1