


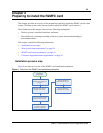


Chapter 3 Installing the R2MFC card 31
R2MFC Card Installation and Configuration Guide
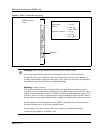
Removing an R2MFC card from the Norstar System
Perform the following steps to remove an R2MFC card from the Norstar platform base chassis.
Remove the R2MFC cards after the system is powered down.
1 Remove any cabling from the R2MFC card faceplate.
2 Power-down the Norstar system (see “Shutting down the system” on page 27).
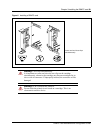
3 Lift the clip located at the top of the R2MFC card and push down the clip located at the bottom
of the R2MFC card. Pull outward to eject the R2MFC card from the Norstar system.
4 Grasp the top and bottom edges of the R2MFC card. Remove the R2MFC card from the
Norstar system. Place the R2MFC card in a clean, safe, and static-free area.
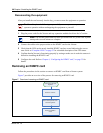
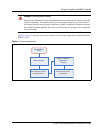
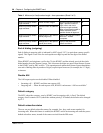
Wiring an R2MFC card
This section describes how to wire the cables that connect to the R2MFC card. The R2MFC card is
connected to the CO by either RJ48C or BNC connectors. The BNC connector is the default
interface. You can change the default connector either by setting the country - selection DIP
switches or by creating a custom country code profile through the CLI. See “Configuring the
R2MFC (external) link” on page 39 for information on how to change the active interface. Refer
to the Installer Guide for the Norstar host system for wiring not related to the R2MFC card.
If the 75 Ω BNC connector pair is used, you require two coax cables for transmit and receive.
If the 120 Ω RJ-48 connector is used, set up the cable pinout as shown in Figure 8 on page 32: