English
Chapter 1 - Printer Setup 9
3. To prevent any accidental spillage of toner, hold
the toner cartridge horizontally and remove the
tape carefully and slowly.
4. Make sure the colours of the toner cartridge and
image drum correspond.
5. Insert the toner cartridge into the image drum, left
side first, engaging the drum spigot (1) in the hole
(2) in the toner cartridge.
6. Gently push the toner cartridge down engaging
the locking pin (3) into the groove (4) on the
image drum.
7. Gently push the coloured lever (5) backward until
it stops to release the toner into the image drum.
Note:
When the printer is switched on after setting up
the printer, the message TONER LOW or
CHANGE TONER maybe displayed. This
message should disappear after the printer has
completed its initialisation sequence. However,
this message sometimes does not disappear until
printing has been carried out. If it still does not
disappear after printing, reinstall the toner
cartridge.
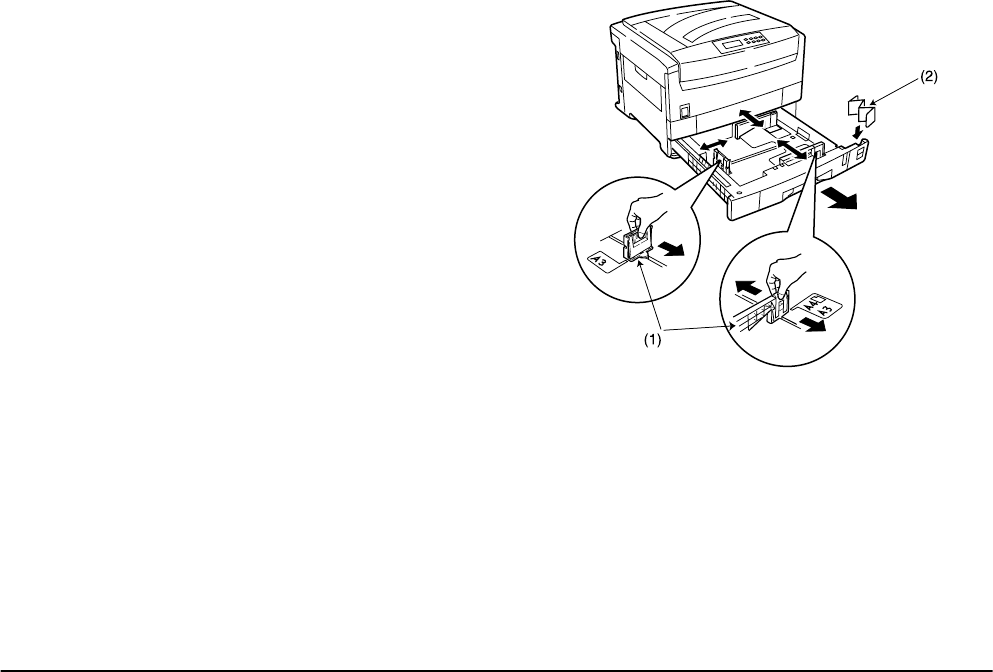
Loading paper
1. Remove the paper tray from the printer.
2. Adjust the paper guides (1) for the size of paper
being used.
3. Insert the paper size indicator (2) into the slot on
the paper tray.
4. Insert the paper keeping the level of the paper in
the tray below the guide marks.
9000GBS.book Page 9 Wednesday, December 6, 2000 10:07 AM


