53
TCP/IP and Link Settings Section 3-8
4. Place the CX-Programmer online with the PLC and transfer the settings to
the EtherNet/IP Unit or built-in EtherNet/IP port.
5. After transferring the settings, a message will ask if you want to restart the
EtherNet/IP Unit or built-in EtherNet/IP port. The Unit/port must be restart-
ed to enable the settings.
6. Check the 7-segment display for the EtherNet/IP Unit or built-in EtherNet/
IP port.
7. If the 7-segment display is tested again after it goes OFF, and finally
displays the IP address, it indicates that the EtherNet/IP Unit has
recognized the new TCP/IP Configuration settings (the IP address in this
case).
Note (1) The EtherNet/IP Unit or built-in EtherNet/IP port must restart in order to
enable the parameter settings that are transferred to it. Verify that restart-
ing the Unit/port will not cause any problems in the system before restart-
ing it.
(2) If the target node address (IP address) is not set correctly, invalid device
parameters may be set in the wrong PLC, so check the connected PLC
before downloading parameters.
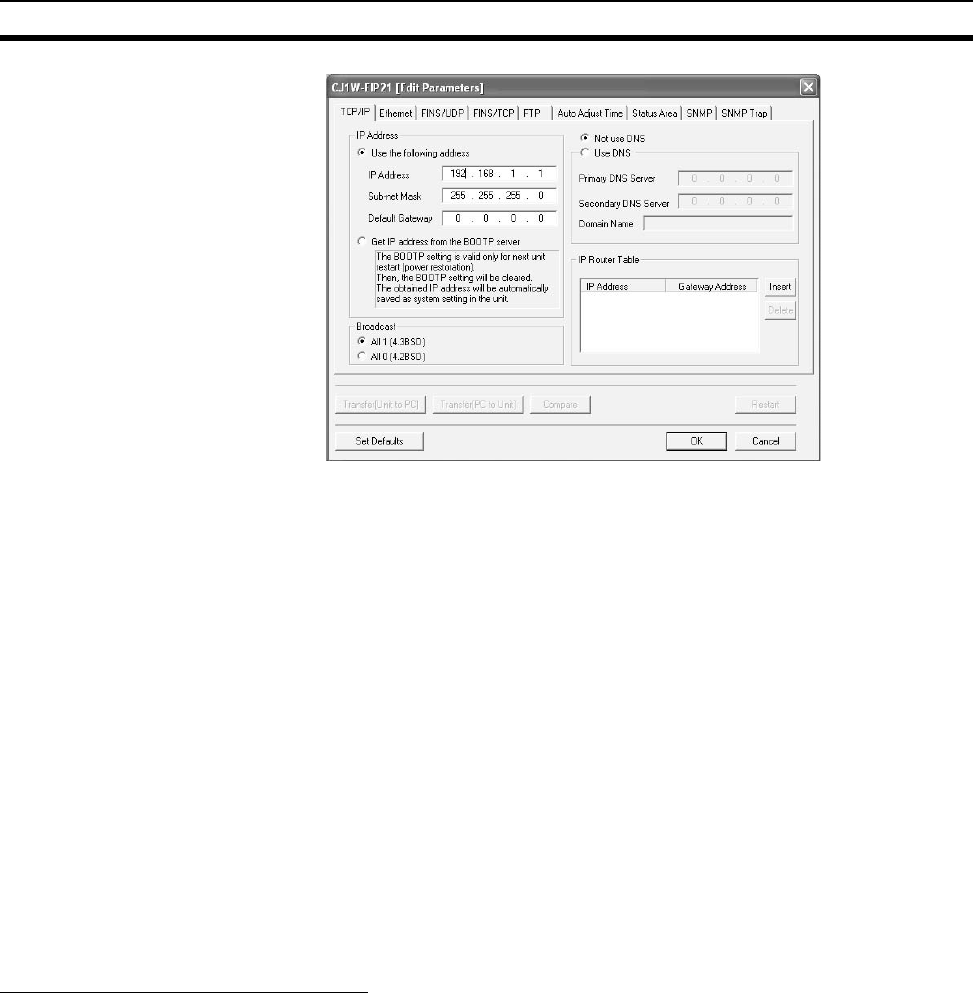
Settings on the TCP/IP Tab Page
Settings for the following items are provided on the TCP/IP Tab Page of the
Edit Parameters Dialog Box in the CX-Programmer.
• IP address
• Subnet mask
• Default gateway
• Broadcasting
• Preferred DNS server
• Alternate DNS server
• Domain name
• IP router table


