


15
1. Functions in each area
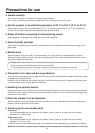
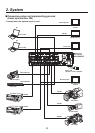
1-6. LCD menu area
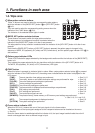
L LCD
The setting menus are displayed on the LCD.
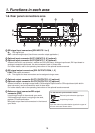
When the [FUNC] button (;) is pressed and its indicator is
lit and then one of the wipe pattern selector buttons (8) is
pressed, the setting menu is displayed.
When the buttons listed below are double-clicked, the
specified menu is selected. (The menu delegation function)
The operation corresponding to the button pressed is also
executed.
POWER
ALARM
F1 F2 F3 F4 F5
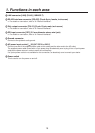
<List of menu delegation functions>
Button Menu
Crosspoint area
(AUX bus selector
buttons)
KEY KEY men
u/Adjust sub menu (2/9)
CHR KEY menu/Auto sub menu (1/3) (with chroma key selection)
DSK DSK men
u/Adjust sub menu (2/7)
PinP PinP menu/Position sub menu (4/6)
Transition area BKGD TIME men
u/BKGD sub menu (1/5)
KEY TIME men
u/KEY sub menu (2/5)
WIPE WIPE men
u/Border sub menu (1/5)
Wipe pattern area WIPE #5 WIPE men
u/WIPEPos sub menu (3/5) (BKGD or KEY)
SQ #5 WIPE men
u/SQPos sub menu (4/5) (BKGD or KEY)
SL #5 KEY menu/FlyKEY sub menu (9/9) (KEY)
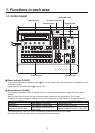
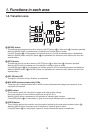
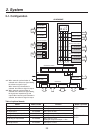
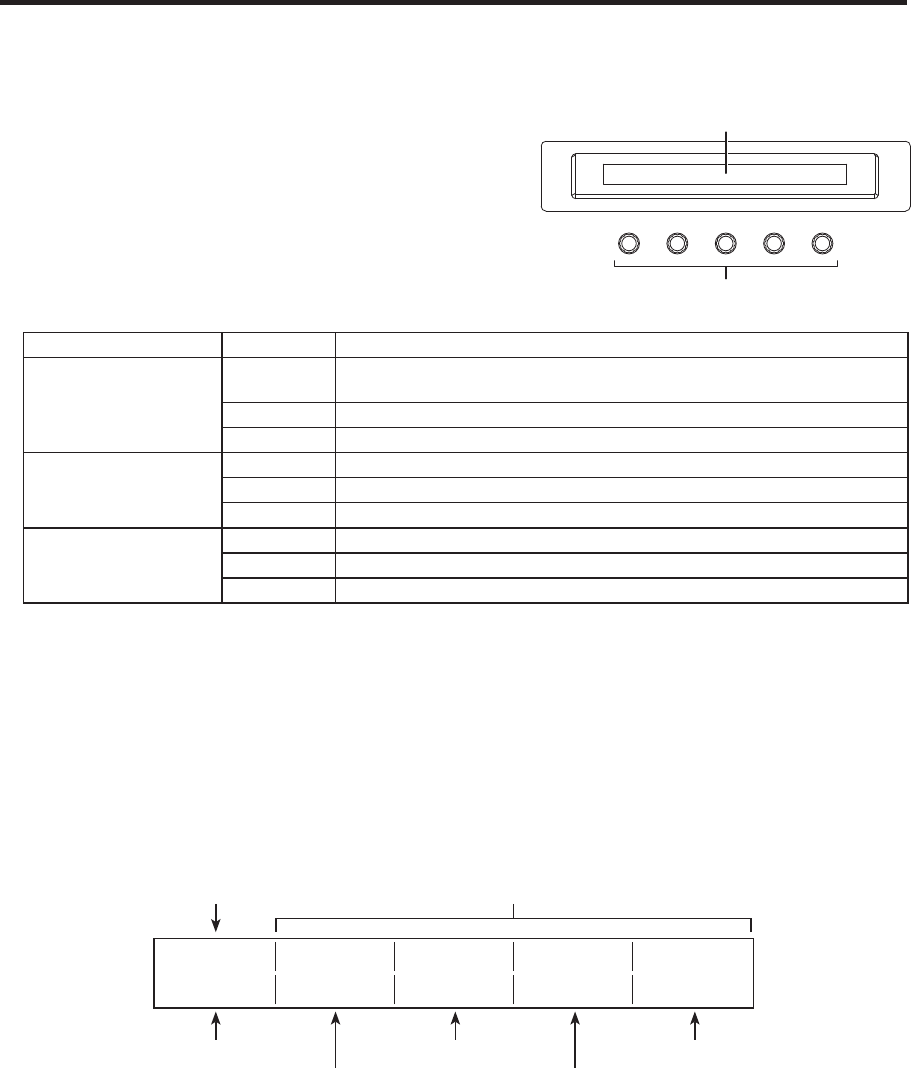
M Rotary encoders [F1] to [F5]
These are used to set the parameters displayed on the menus (LCD screen or external monitor).
For details on the operations, refer to the sections in “3. Basic operations”.
[F1]:
Rotate this rotary encoder to switch the sub menu.
[F2] to [F5]:
Rotate these rotary encoders to set the parameters.
When the down arrow (↓) is shown at a menu item, its parameter is set by pressing the corresponding rotary
encoder.
When the parameter is one which is set using a numerical value, its default will be restored when the rotary
encoder is held down.
(However, the network settings and the date and time settings will not be returned to the defaults.)
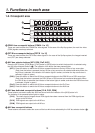
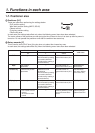
Adjust Clip Gain Density Invert
2/9 0.0 100.0 100.0 Off
Operate here
using [F1].
Operate here
using [F2].
Operate here
using [F3].
Operate here
using [F4].
Operate here
using [F5].
Sub menu Parameter setting area