


9-26
9.2.16. Setting the Top Cover
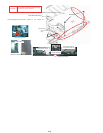
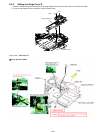
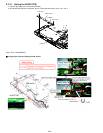
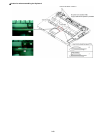
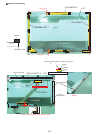
1. Connect the KBD FPC and FFC to the Connectors(CN22 and CN23), and place the Top Cover on the computer.
2. Fix the Top Cover using the five Screws <N8>. No.1 to No.5
3. Fix the Top Cover using the Screw <N12>.
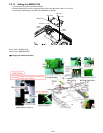
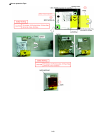
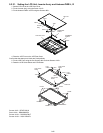
4. Fix the BT UNIT PCB to the Top Cover using the Screw <N2> and connect the Cable to the connector.
5. Fix the Top Cover using the Screw <N2>, and paste the Tape and WP Sheet on it.
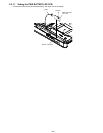
6. Fix the Cover BT to the Top Cover using the two Screws <N9> No.1, No.2, and paste the Screw Sheet on the Screws.
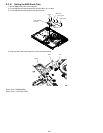
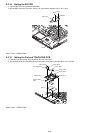
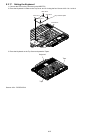
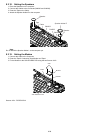
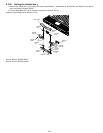
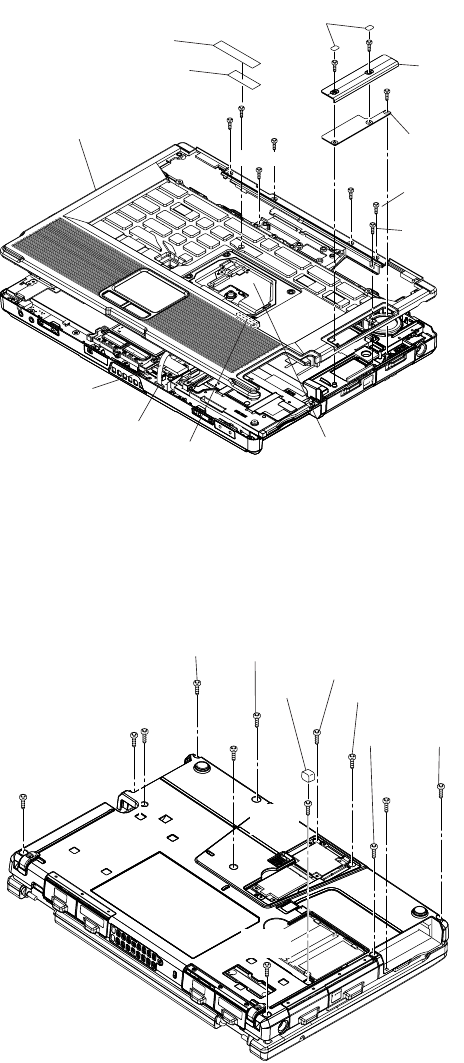
7. Fix the Bottom Case to the Top Cover using the Screw <N2>, <N4> and ten Screws <N14>. No.1 to No.12
8. Fix the Bottom Case using the Screw <N9>.
9. Paste the Gasket on the Screw <N14>.
Screws <N2> : DFHE5122YA
Screw <N4> : DRHM0093ZA
Screws <N8> : DRHM5054XAT
Screws <N9> : DRHM5104ZAT
Screws <N12> : DXSB2+4FNLT
Screws <N14> : XTB26+10GJKT
Screw
sheet
Cover
BT
BT UNIT
PCB
CN22
KBD FPC
CN23
FFC
<N9>
:No.2
WP sheet
Tape
<N9>:No.1
<N2>
<N2>
<N8>:No.1
Top cover ass'y
<N8>:No.3
<N12>
<N8>
:No.4
<N8>
:No.2
<N8>
:No.5
<N2>
:No.12
<N14>
:No.10
<N14>
:No.2
<N4>:No.11
Gasket
<N9>
<N14>
:No.5
<N14>
:No.1
<N14>
:No.6
<N14>:No.8
<N14>
:No.3
<N14>
:No.4
<N14>
:No.7
<N14>
:No.9