


102
Installing Macintosh Software
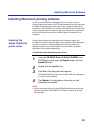
After you install the printer driver and printer description file, you need to set
up the KX-P8420 in the Chooser. This section describes how to set up the
KX-P8420 with the Adobe PostScript printer driver.
To set up the KX-P8420 in the Chooser:
1
In the Chooser, ensure AppleTalk is enabled.
NOTE:
• If necessary you may need to add the AppleTalk zone in which
your printer is located.
2
Click the AdobePS printer icon in the Chooser.
3
Select the name of the KX-P8420 from the scroll list—
Panasonic KX-P8420_Direct, Panasonic
KX-P8420_Print, or Panasonic KX-P8420_Hold.
NOTES:
• If the optional hard disk drive is not installed in the printer, only
Panasonic KX-P8420_Direct appears.
• The name of a printer corresponds to the system name you
edited when you configured a connection to the printer. See
“System Setup” on page 114.
4
Click Create or Setup.
5
Confirm an icon appeared to the left of the printer name
selected in step 3.
6
Select the name of the KX-P8420.
7
Click Setup.
8
In the dialog box that appears, click Configure.
If your printer does not have additional devices installed, skip to
step 12.
9
From the pop-up menus, specify the device options
installed on your printer. Click OK.
This step must be completed to enable features in the printer driver
relating to devices installed on the printer.
Setting up the
KX-P8420 in the
Chooser