


118
Installing Software for Windows
■
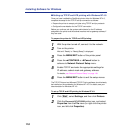
Setting up TCP/IP and LPR printing with Windows NT 4.0
Once you have installed the PostScript printer driver for Windows NT 4.0,
complete the setup for the TCP/IP and lpr connection as follows:
• Prepare the printer to accept print jobs using TCP/IP and lpr protocols.
• Configure the workstation for the TCP/IP connection.
Before you continue, ask the system administrator for the IP address
assigned to the printer and the subnet mask as well as gateway address, if
they are used.
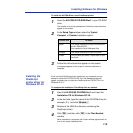
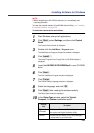
To prepare the printer for TCP/IP and LPR printing:
1
With the printer turned off, connect it to the network.
2
Turn on the printer.
Wait until “Ready” or “Ready(Sleep)” is displayed.
3
Press the MENU/EXIT button of the printer panel.
4
Press the ▲/CONTINUE or ⁄/Cancel button to
advance to Network Protocol Setup menu.
5
Enable TCP/IP and enter the appropriate settings for
IP address, subnet mask and gateway address.
For details, see “Network Protocol Setup” on page 148.
6
Press the MENU/EXIT button to exit the setup menus.
The TCP/IP Protocol and Microsoft TCP/IP Printing software should already
be installed on the workstation for Windows NT 4.0. For details, see your
documentation for Windows NT 4.0.
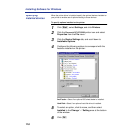
To set up TCP/IP and LPR printing for Windows NT 4.0:
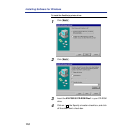
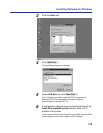
1
Click [Start], select Settings, and then click Printers.
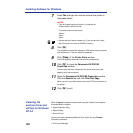
2
Click the Panasonic KX-PS8100 printer icon, and select
Properties from the File menu (or right-click the printer
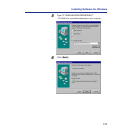
icon, and left-click Properties).