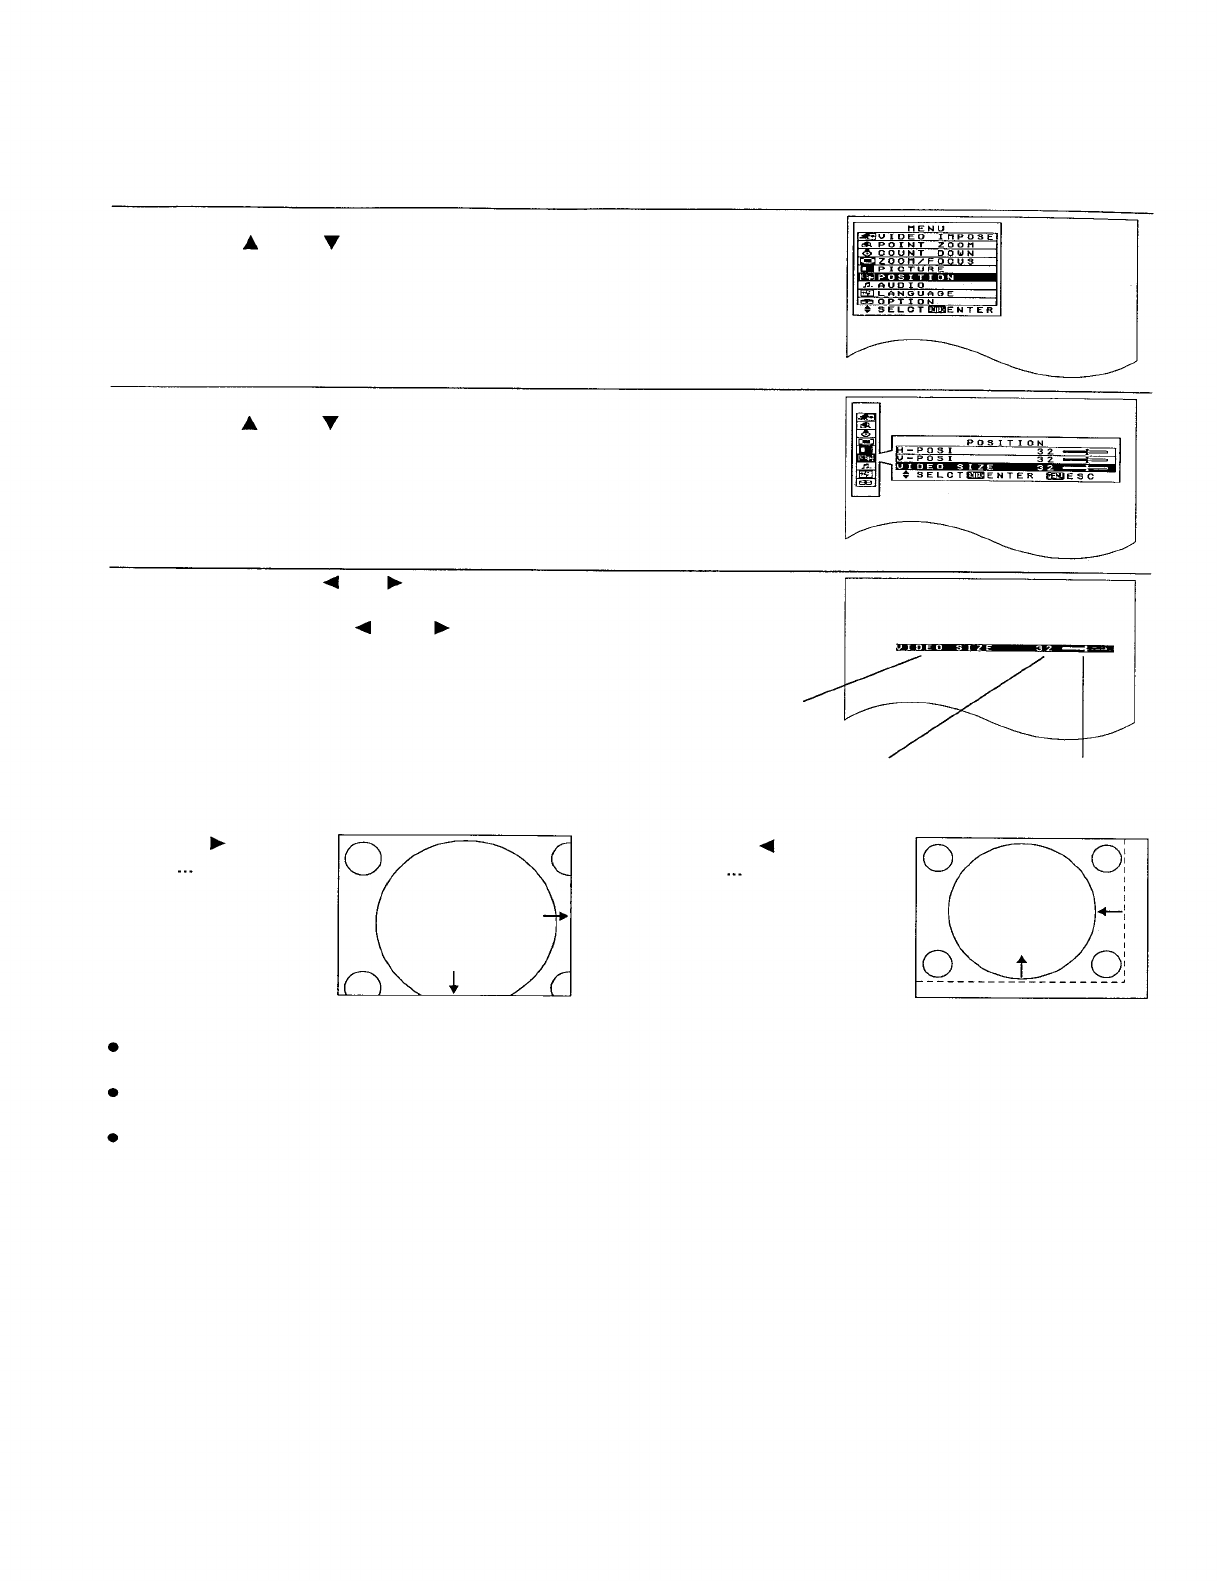
Adjusting the video size
The video size can be adjusted to overscan and underscan sizes only when VIDEO and S-VIDEO signals are
being input. Adjust by the following procedure.
Adjustment procedure
1. Press the MENU button to display the menu screen.
2. Press the “ ” and “
” buttons to select “POSITION”.
3. Press the ENTER button to display the POSITION screen.
4. Press the “ ” and “ ” buttons to select “VIDEO SIZE”.
5. Press the ENTER, “ ” or " ” button to display the VIDEO SIZE
individual adjustment screen.
6. Continue pressing the " ” and “
” buttons to adjust the VIDEO SIZE
setting. The current setting will be displayed on the screen by numerals
and a bar.
Adjustment func-
tion display
<For overscanning>
Press the “ ” arrow
button. The picture
will extend to the
right and downward.
Numeric adjustment
level display
<For underscanning>
Press the “ ” arrow
button. The picture
will contract to the left
and upward.
Bar display
NOTE:
If video size adjustment results in the picture position tending to one side, adjust the position while referring to
page 29.
If no button is pressed for approximately 5 seconds while an individual adjustment screen is being displayed, the
display will return to the PICTURE screen.
If the MENU button is pressed, the display will return to the MENU screen, or the MENU screen will be cleared if
it is already being displayed.
30
