


[NETWORK] menu
ENGLISH - 73
Settings
[NETWORK] menu
Select [NETWORK] from the main menu, and
select the item from the sub-menu.
Refer to
“
Navigating through the menu
”
(
page 41) regarding the operation of the menu
screen.
z
After selecting the item, press to set.
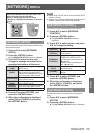
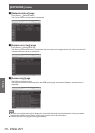
[NETWORK SETUP]
Perform the initial setting of the network before using
the network function.
1) Press
▲▼
to select [NETWORK
SETUP].
2) Press the <ENTER> button.
z
The [NETWORK SETUP] screen is displayed.
3) Press
▲▼
to select an item, and
change the settings according to the
operation instructions of the menu.
[PROJECTOR
NAME]
Change the setting when using a
DHCP server.
[DHCP]
Set this to [ON] when using a
DHCP server to acquire the IP
address automatically. Set to [OFF]
when not using a DHCP server.
[IP ADDRESS]
Enter the IP address when not
using a DHCP server.
[SUBNET
MASK]
Enter the subnet mask when not
using a DHCP server.
[DEFAULT
GATEWAY]
Enter the default gateway address
when not using a DHCP server.
[STORE] Save the current network settings.
4) Press
▲▼
to select [STORE], and
press the <ENTER> button.
5) When the conrmation is displayed,
select [OK] or [CANCEL], and press
the <ENTER> button.
Note
z
When using a DHCP server, conrm that the DHCP
server is running.
z
Consult your network administrator regarding the IP
address, subnet mask, and default gateway.
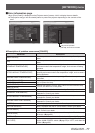
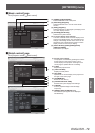
[NETWORK CONTROL]
You can set up the control method of the network.
1) Press
▲▼
to select [NETWORK
CONTROL].
2) Press the <ENTER> button.
z
The [NETWORK CONTROL] screen is
displayed.
3) Press
▲▼
to select an item, and press
◀▶ to change the setting.
[WEB
CONTROL]
Set to [ON] to control with the Web
browser.
[PJLink
CONTROL]
Set to [ON] to control with the
PJLink protocol.
[COMMAND
CONTROL]
Set to [ON] to control with the
<SERIAL IN>/<SERIAL OUT>
terminal control command format
(
page 99).
Refer to
“
Control commands via
LAN
”
(
page 96).
[COMMAND
PORT]
Set the port number used for
command control.
[STORE]
Save the current network control
settings.
4) Press
▲▼
to select [STORE], and
press the <ENTER> button.
5) When the conrmation is displayed,
select [OK] or [CANCEL], and press
the <ENTER> button.
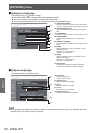
[NETWORK STATUS]
Displays the status of the network for the projector
body.
1) Press
▲▼
to select [NETWORK
STATUS].
2) Press the <ENTER> button.
z
The [NETWORK STATUS] screen is displayed.