ENGLISH -
19
Preparation
About Your Projector
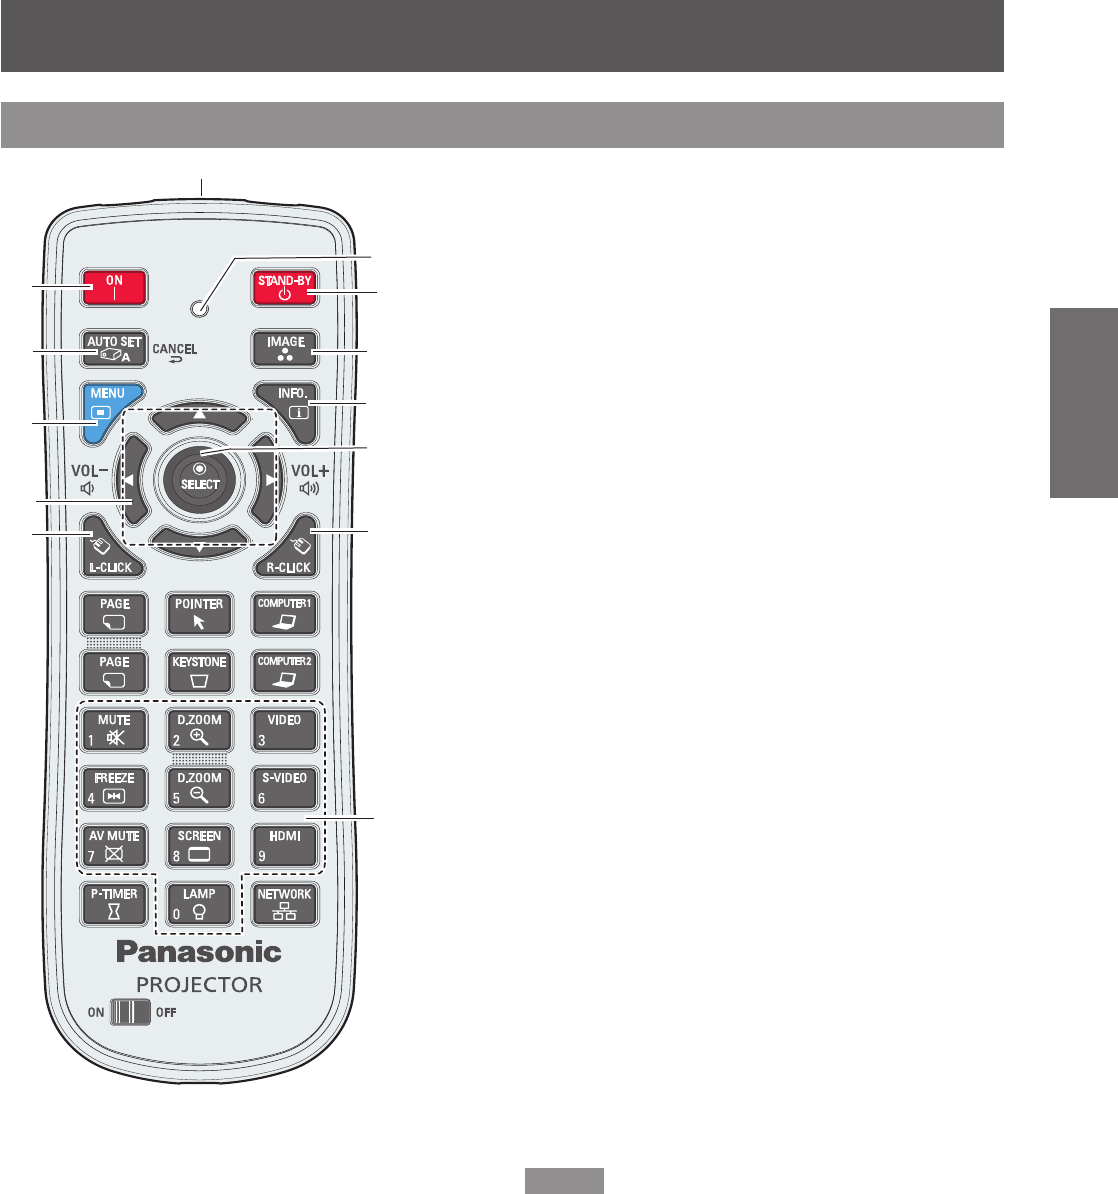
Remote control
*
Center part is <SELECT> Button.
Outer part is <MOUSE POINTER>
Button.
(1) <STAND-BY> Button
Turn the projector off (
Æ
page 33).
(2) Signal Emission indicator
Light red while a signal is being sent from the
remote control to the projector.
(3) Remote control signal emitter
(4) <ON> Button
Turn the projector on (
Æ
page 31).
(5) <AUTO SET/CANCEL> Button
Execute the setting of Auto setup in the setting
menu (
Æ
page 56).
Cancel the playing of the memory viewer function.
(Refer to "Operating Instructions - Network
operations").
(6) <MENU> button
Open or close the On-Screen Menu (
Æ
page 40).
(7)▲▼◄► (VOL-/+) Buttons , <SELECT> Button
_
Navigate the MENU display.
_
Adjust the volume level or mute the sound.
(8) <L-CLICK> Button
Act as the left mouse button for wireless mouse
operation (
Æ
page 37).
(9) Number Buttons
Act as number buttons. Use these buttons when
setting the remote control codes (
Æ
page 24) or
entering the PIN code numbers (
Æ
page 32).
(10) <R-CLICK> Button
Act as the right mouse button for wireless mouse
operation (
Æ
page 37).
(11) <MOUSE POINTER> Button
Move a pointer of the projector or a pointer for
wireless mouse operation (
Æ
page 37).
(12) <INFO.> Button
Operate the information function (
Æ
page 64).
(13) <IMAGE> Button
Select the image mode (
Æ
page 36).
Note
The remote control can be used as a wireless mouse for
z
your computer.
Before operating the wireless mouse, connect your
z
computer and the projector with a USB cable
(
Æ
page 37).
When a USB cable is connected to the computer and the
z
projector, turn on the projector rst, then the computer.
(8), (10), (11), (15) are available when a USB cable is
z
connected to the computer and the projector.
(4)
(1)
(5)
(8)
(6)
(3)
(10)
(13)
(7)
(9)
(12)
(2)
(11)
*


