34
- ENGLISH
Basic Operation
Projecting
Adjusting the image
automatically
Easy setting function makes the semi-automatically
adjustment possible, so that to get the optimal image.
Auto setup function including these following functions
(
Æ
page 56-57).
Input search
Switching the input signal
automatically.
Auto PC adj.
The image projected from the
computer automatically is optimal.
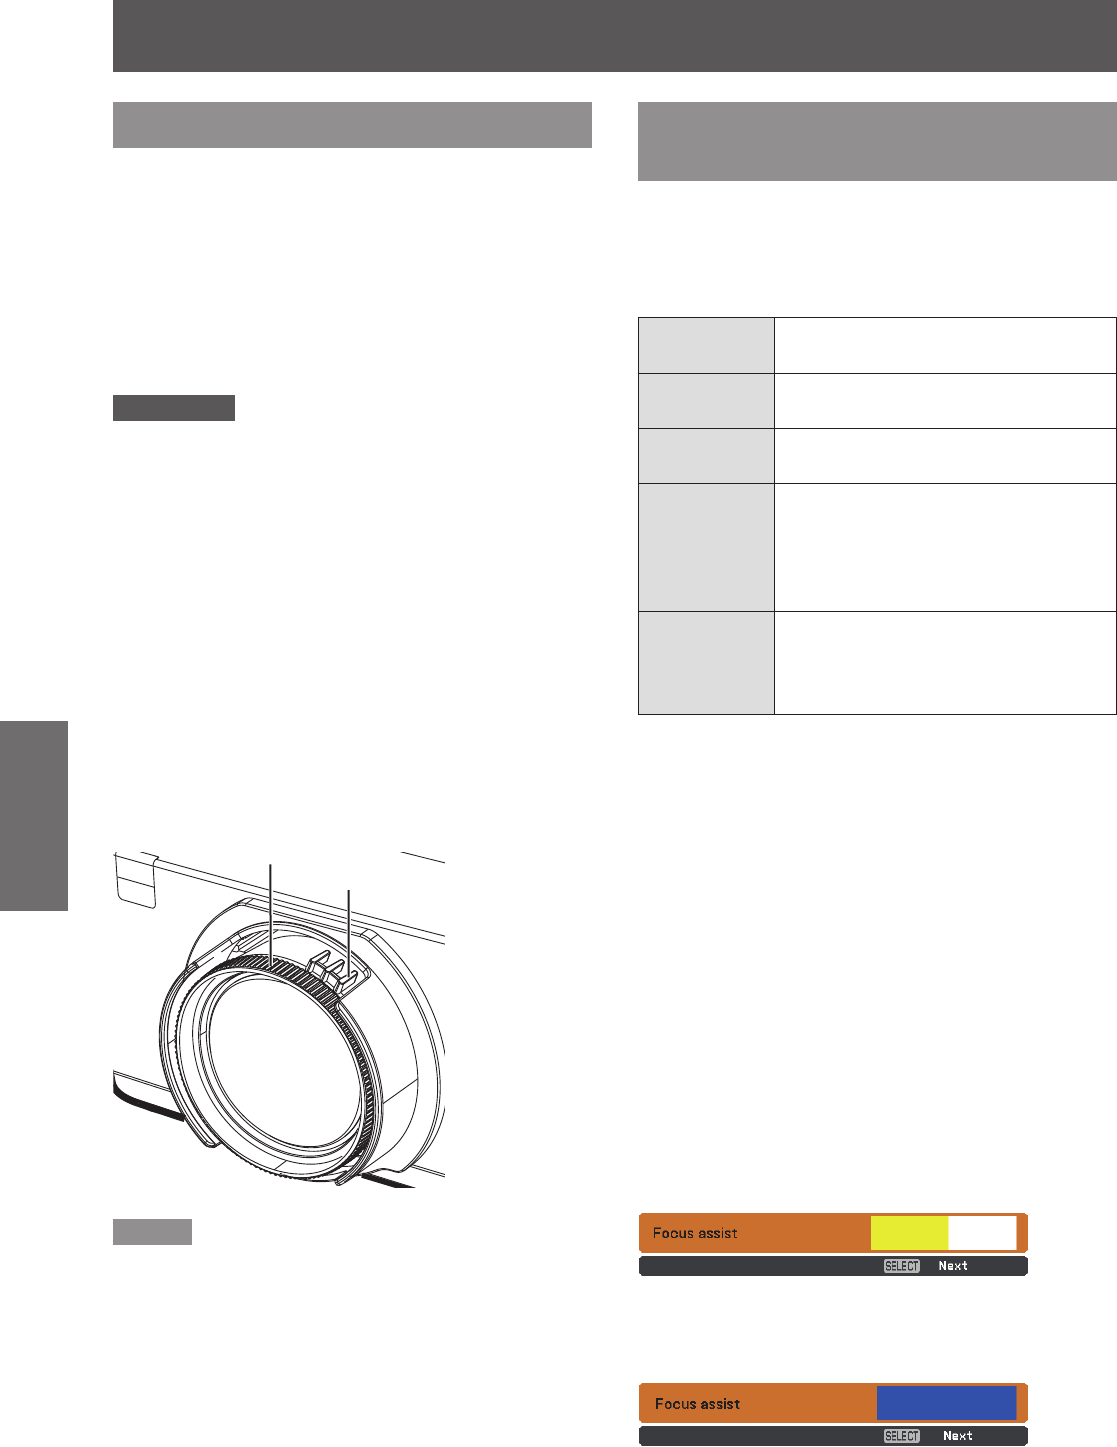
Focus assist
The color of the bar assists the focus
adjustment.
Screen t
Detect and correct the image
automatically to t the frame. If
you can not detect the frame of
the screen, Keystone (standard)
executes automatically.
Colorboard
The color values will change
automatically to reach the optimal
white balance according to the color
of screen.
J
Auto setup
When all of the above mentioned functions are set to
[On], the adjustment orders are as follows.
Project an image.1 )
Adjust the zoom ring so that the image is 2 )
larger than the screen frame.
Press the <AUTO SET> button on the remote 3 )
control or the <AUTO SETUP> button on the
control panel during projection.
[Please wait ...] appears, Input search function
starts to work and select an input signal.
If the input signal is an computer (analog)
signal, Auto PC adj. function starts to work
and get an optimal image.
Next, a test pattern for [Focus assist] appears
on the screen and the focus assist bar appears
in the center bottom of the screen.
Rotate the focus ring until the bar changes to 4 )
blue and the image reaches to the maximum
level.
Adjusting the image manually
Check the connections of the peripheral devices and
connection of the power cord (
Æ
page 29) and switch
on the power (
Æ
page 31) to start the projector.
Selecting the image
J
Select an input signal.
The image selected with the <COMPUTER 1>,
<COMPUTER 2>, <HDMI>, <VIDEO>, <S-VIDEO>,
or <NETWORK> button is projected (
Æ
page 38).
Attention
Images may not be projected properly depending on the
z
connected device and DVD, video tape, etc. to be played.
Select a system format that is suitable for the input signal
in [Component] or [RGB] in the [Input] menu (
Æ
page 43).
Check the aspect ratio of the screen and the image and
z
select the optimum aspect ratio under the [Screen] menu
(
Æ
page 52).
Adjusting the state of the image
J
Adjust the projection angle1 )
For details, see “Adjusting front adjustable feet”
z
(
Æ
page 27).
Adjust the zoom and the focus2 )
Turn [Zoom lever] and [Focus ring] to adjust the
image.
Note
If you adjust the focus, you may need to adjust the size
z
of the image by moving the zoom lever again.
If keystone distortion occurs, see “KEYSTONE”
z
(
Æ
page 53).
Focus ring
Zoom Lever


