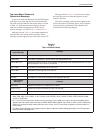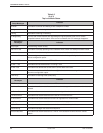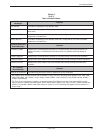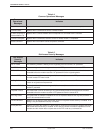
Front Panel Operation
4-113980-A2-GB30-40 October 1998
Selecting Factory
Configuration Options
After the modem passes the power-up self-test,
configure it for operation using one of the factory preset
configurations.
The 3800Plus modems have several factory preset
templates that contain the most commonly used
configuration options (straps) for Asynchronous Dial,
Synchronous Dial, Synchronous Leased (Answer or
Originate), UNIX hardware network, cellular mobile, and
cellular PSTN configurations. Your modem is shipped
from the factory with the Async Dial default configuration
options stored in memory. If Sync Dial, Sync Leased,
UNIX Dial, or Cellular is more appropriate for your
configuration, then you must change the factory setting
using either the modem’s DCP or the AT command set as
described in the following sections.
The preset configuration gives you a “head start” in
getting your modem operating and reduces the amount of
time required to configure your modem. For a better
understanding of DCP operation and factory preset
configuration options, refer to Chapter 8, Configure
Branch.
Using the Diagnostic Control Panel (DCP)
The DCP’s liquid crystal display (LCD) consists of two
16-character lines which display modem status, control
functions, and configuration options as well as indicating
your location in the Top-Level menu tree (Appendix A).
To change the factory template using the DCP, perform
the following steps:
1. On the DCP press the
key until Configure
comes into view.
2. Press the function key below Configure to select
the Configure branch.
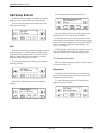
The LCD now displays Ld EditArea frm.
3. Press the
key until Factory comes into view,
then press the F1 key to display the factory preset
configurations.
Factory preset configurations are Async Dial,
Sync Dial, Sync Leased, UNIX Dial, Cellular
(Mobile), and Cellular (PSTN). If Sync Leased is
selected, you must choose either Answer or
Originate mode.
4. Press the
key until the appropriate factory
preset appears on the LCD, and press the
corresponding function key to select your choice.
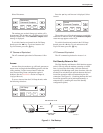
5. Choose Function appears and displays the Edit
and Save functions.
6. Press the F3 key (Save) to save the new factory
preset configuration to one of three configuration
areas, Active (Saved), Customer 1, or
Customer 2.
(These three configuration areas are nonvolatile
memory locations. Active (Saved) contains the
most recently saved changes to any configuration
options. In the event of power loss, the modem
retrieves these configuration options. Customer 1
and Customer 2 are user-defined configuration
areas.)
The LCD now displays Sav EditArea to.
7. Press the
key until the appropriate
configuration area appears on the LCD, then press
the corresponding function key to select your
choice. (Saving configuration options to the
Active (Saved) configuration area automatically
saves them to the Active (Operating)
configuration area.) The LCD displays Command
Complete.
8. The modem is now configured with the selected
factory template. Press the
key to return to the
Top-Level menu.
Refer to Chapter 8, Configure Branch, for more
information regarding default factory configuration
options.
Using AT Commands
When using AT commands, the following criteria must
be met:
• Make sure the asynchronous DTE’s communication
software is configured for 10-bit character format
(for example, 8 data bits, no parity, and 1 stop bit).
• Make sure the DTE (RS-232D) cable is attached to
the DTE connector on the rear of the 3810Plus
modem, or (for the 3811Plus modem) the rear of
the COMSPHERE 3000 Series Carrier, and the
correct serial communications port on the
asynchronous DTE.


