Tech
Tips
Helpful Tips for Pelco Products
World Headquarters
3500 Pelco Way, Clovis, California 93612 USA
USA & Canada Tel: 800/289-9100 Fax: 800/289-9150
International Tel: 1-559/292-1981 Fax: 1-559/348-1120
www.pelco.com
Pelco and the Pelco logo are registered trademarks of Pelco, Inc.
Information subject to change without notice.
©Copyright 2008, Pelco, Inc. All rights reserved.
Page 17 of 21 DX8100-ISCI_SCSI_CARD_SATABoy.fm
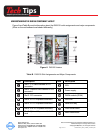
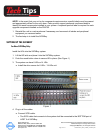
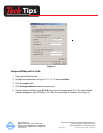
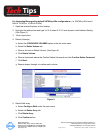
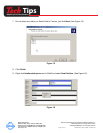
k. Click the Back button and repeat steps from e to i until all volumes are created. (See Figure 13)
Figure 13
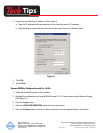
Configure the SATABoy to SCSI card --- Final steps for new SATABoy or modified SATABoy.
Note: Need to wait 4-5 hours for raid array to initialize if a new raid array is created.
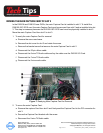
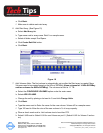
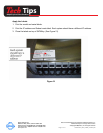
1. Make sure the SCSI cable is connected between the SCSI card and the DX8100.
2. Start the DX8100.
3. Open the Computer Management by selecting the Start button, select Run and type
compmgmt.msc. Click OK or press Enter.
4. Click Disk Management.
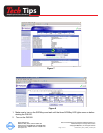
5. Click Next on the Welcome Wizard.
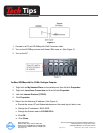
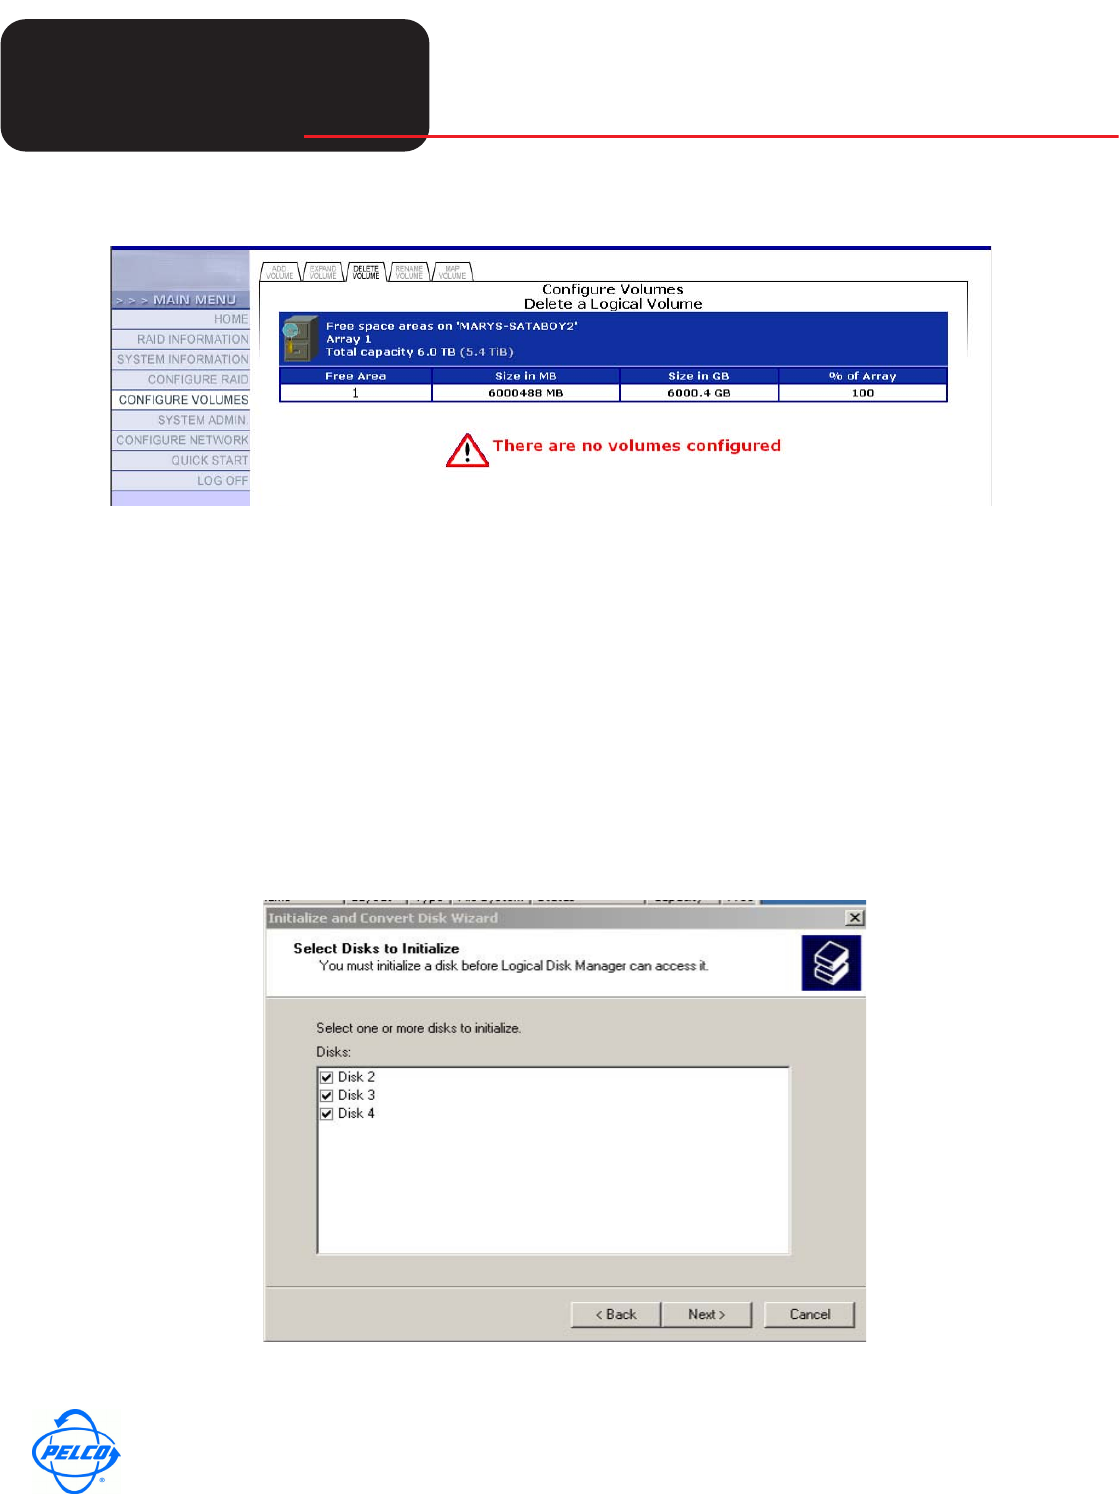
6. Make sure all the disks are selected and click Next. (See Figure 14)
Figure 14