Tech
Tech
Tips
Helpful Tips for Pelco Products
World Headquarters
3500 Pelco Way, Clovis, California 93612 USA
USA & Canada Tel: 800/289-9100 Fax: 800/289-9150
International Tel: 1-559/292-1981 Fax: 1-559/348-1120
www.pelco.com
Pelco and the Pelco logo are registered trademarks of Pelco, Inc.
Information subject to change without notice.
©Copyright 2008, Pelco, Inc. All rights reserved.
Page 7 of 21 DX8100-ISCI_SCSI_CARD_SATABoy.fm
4. This completes installation of the SCSI card. Next, reassemble the DX8100 and then install the
SATABoy. For information about reassembling the unit, refer to Reassembling the Unit on page 7.
REASSEMBLING THE UNIT
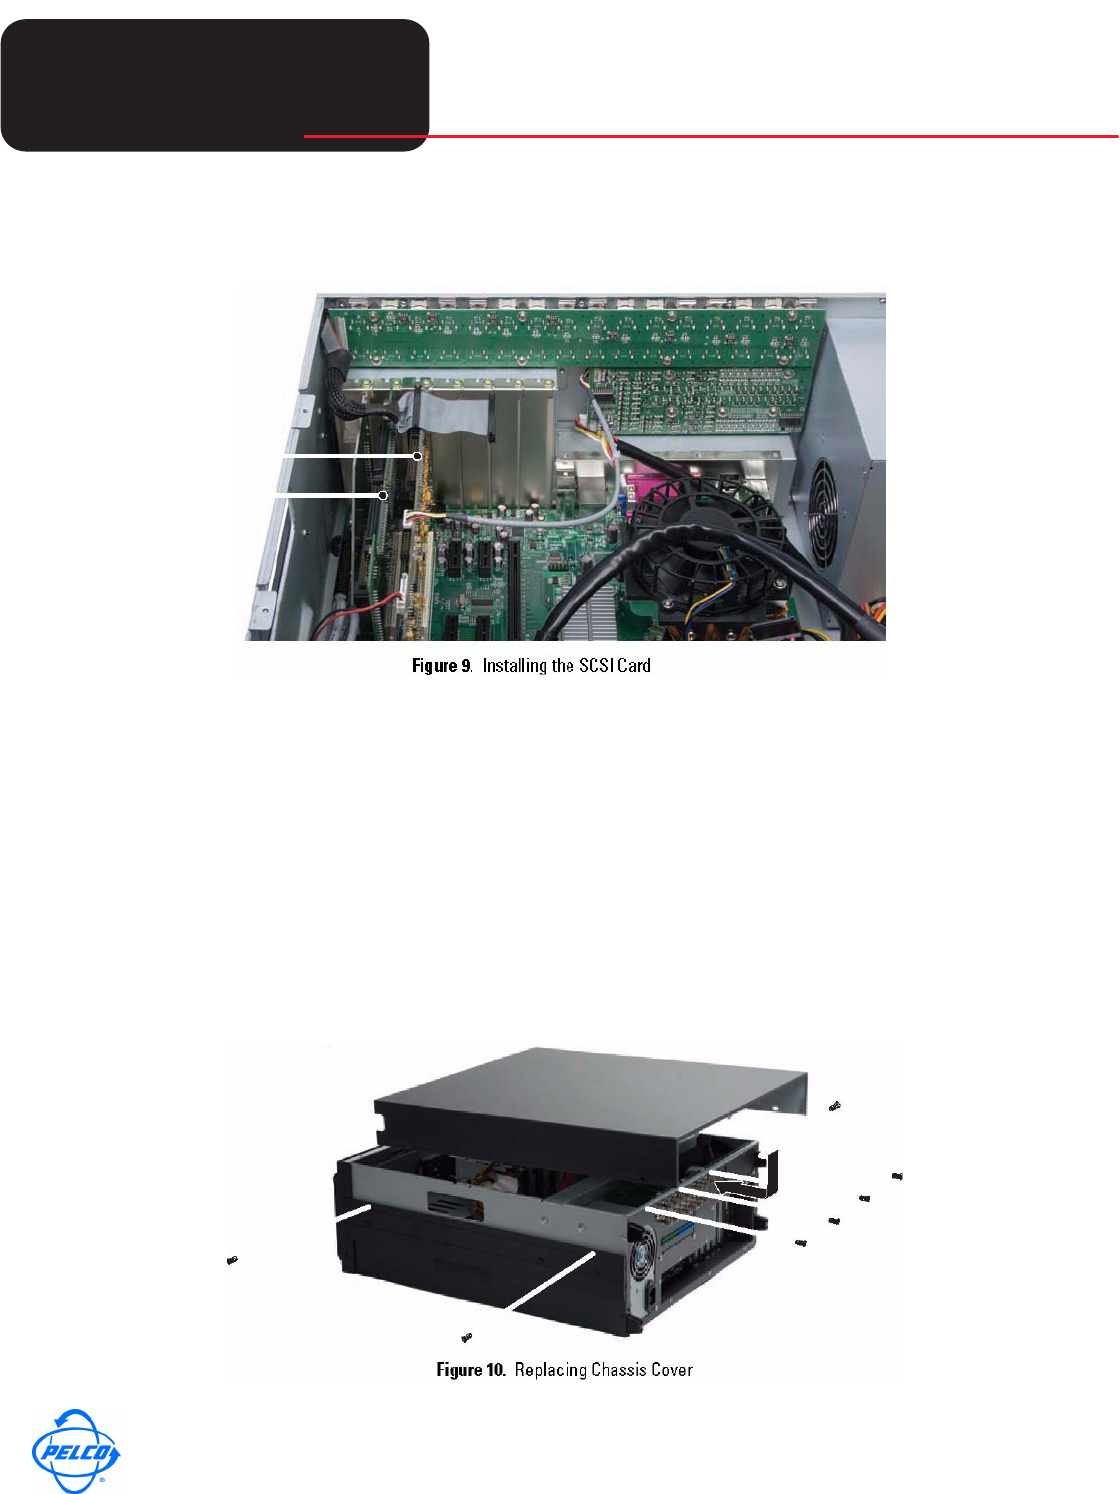
1. Replace the chassis cover using the screws you removed from the side and rear of the unit. Refer
to Figure 10.
2. Attach the silver product label that came with your upgrade kit to the inside of your DVR’s front
door.
a. Remove the paper backing from the product label.
b. Carefully place the label, adhesive-side down, on a free section of the inside of the door.
c. Press down firmly to ensure that the label properly adheres to the inside of the door.


