Tech
Tips
Helpful Tips for Pelco Products
World Headquarters
3500 Pelco Way, Clovis, California 93612 USA
USA & Canada Tel: 800/289-9100 Fax: 800/289-9150
International Tel: 1-559/292-1981 Fax: 1-559/348-1120
www.pelco.com
Pelco and the Pelco logo are registered trademarks of Pelco, Inc.
Information subject to change without notice.
©Copyright 2008, Pelco, Inc. All rights reserved.
Page 8 of 21 DX8100-ISCI_SCSI_CARD_SATABoy.fm
NOTE: In the event that your unit or its components require service, specific labels must be present
and appropriately affixed to the unit’s door. Pelco product support personnel use these labels to
identify the exact components installed in your system. A separate product label is required for each
upgrade component installed on the DX8100.
1. Reinstall the unit in a rack enclosure if necessary, and reconnect all cables and peripheral
equipment you removed earlier.
2. The final step is to install the SATABoy.
SETTING UP THE SATABOY
For New SATABoy Only:
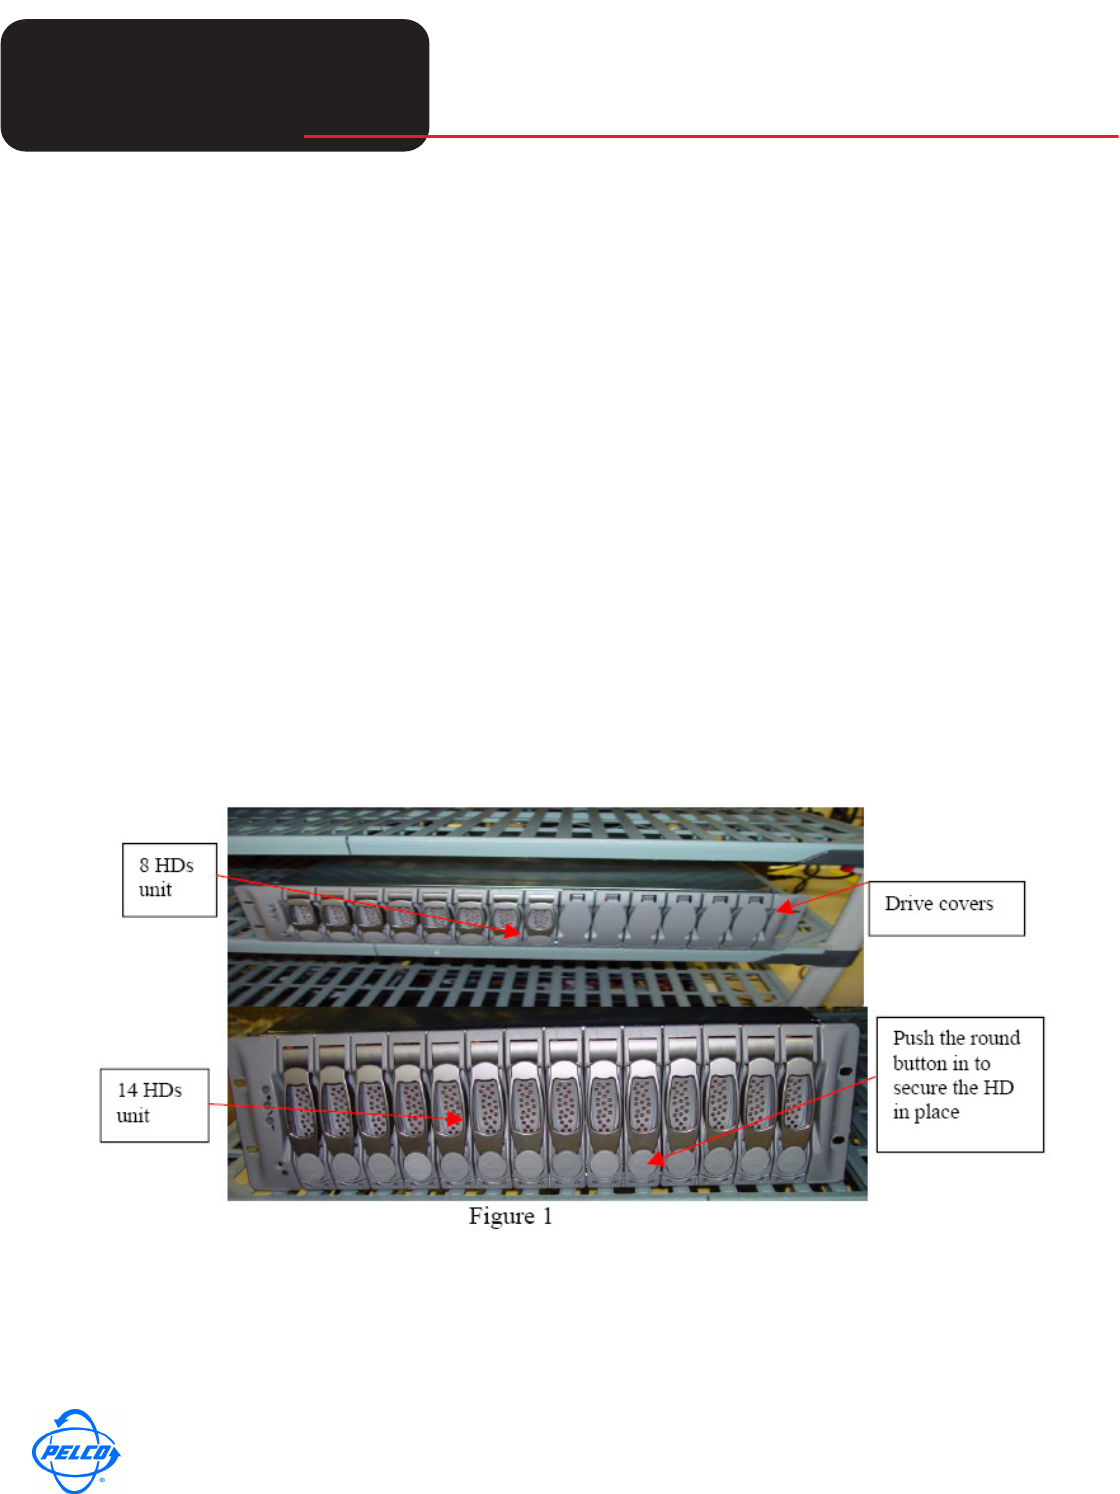
Install the HDs into the SATABoy system:
1. Lift the HD latch and place it into the SATABoy system.
2. Push the round button down to secure HD in place. (See Figure 1)
3. The system can have 8 HDs or 14 HDs.
a. Install the drive covers for 8 HDs / 14 HDs unit.
4. Plug in all the cables.
a. Connect SCSI cable:
• The SCSI cable that connects to the system shall be connected to the BOTTOM port of
HOST 0 of SATABoy.
