


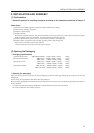

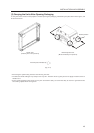

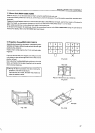
45
(Fig. 3-19)
H-shape frame assembly (L)
4 Rivet
5 Shield
2 H-shape frame assembly (L)
1 Screw (M5 × 35)
1 Stopper
Table
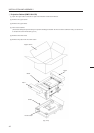
1 Base assembly
B-5 Guide fixture
A-5 Holder (R)
A-5
Holder (L)
2 H-shape frame
assembly (R)
3 Horizontal frame assembly
A-7
B-6
Screw (M5 × 35)
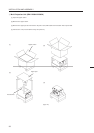
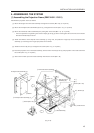
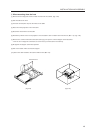
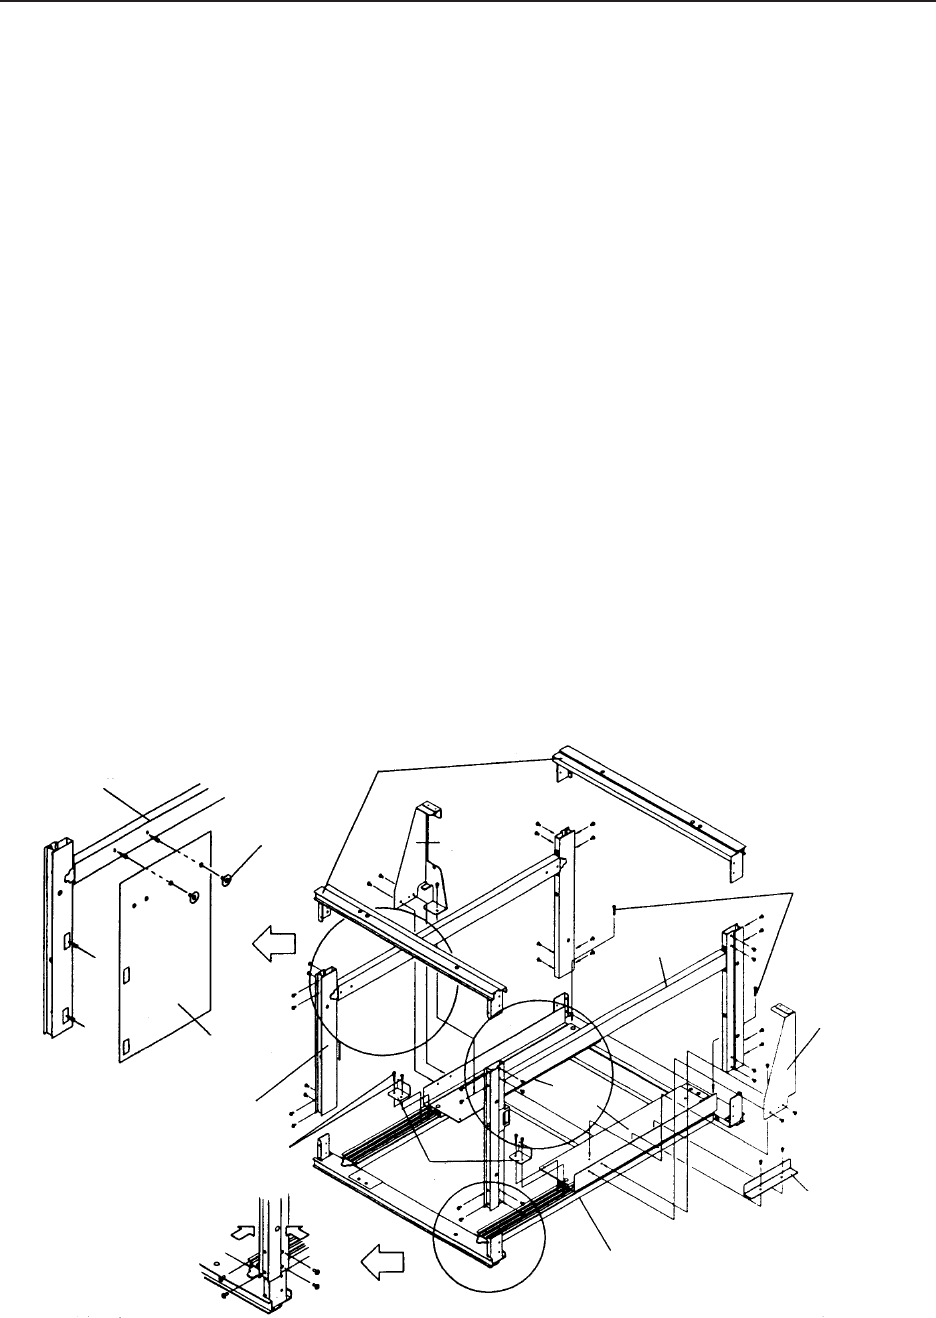
4. ASSEMBLING THE SYSTEM
(1) Assembling the Projection Frame (RMF-V4011/V5011)
Assemble the projection frame as follows.
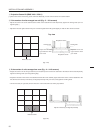
[1] Mount the stopper onto the base assembly and tighten the screws (M5 × 35). (2 × 2 points)
[2] Mount the H-shape frame assemblies (R) and (L), and tighten the screws (M5 × 10). (4 × 4 points)
[3] Mount the horizontal frame assemblies (two) and tighten the screws (M5 × 10). (4 × 4 points)
* As for the positions for tightening the screws in steps [2] and [3], push the frame against the corner fixtures in the two
directions indicated by the arrow.
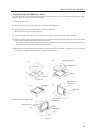
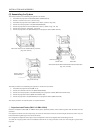
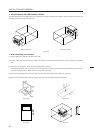
[4] Attach the shield to the H-shaped frame assembly (L) using rivet, and paste the magic tape on the H-shaped frame
assembly (L) according to the magic tape pasted on the shield.
[5] Attach the fixtures (R) and (L) and tighten the screws (M5 × 10). (3 × 2 points)
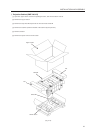
[6] Place the projection unit on the base assembly, and secure the fixtures (R) and (L) and projection unit to each other with
the screws (M5 × 10). (2 × 2 points)
[7] Secure the movable part of the base assembly with the two screws (M5 × 35).
INSTALLATION AND ASSEMBLY