


55
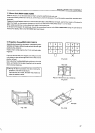
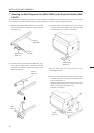
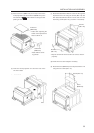
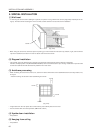
(5) Paste cushion A (BMR1106) to the top board of the
multi-projection unit and cushion B (BMR1107) to the
two sides at the position shown in the figure after
peeling off the seal.
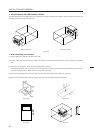
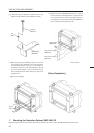
(6) Insert the multi-projection unit from the rear of the
unit in this state.
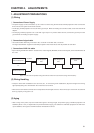
(7) Attach the attachments R and L to the unit through the
top board of the unit using the screws (M6 × 20) and
then attach attachments R and L to the unit from the
back using screws (M6 × 20). (2 screws × 2 locations).
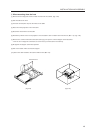
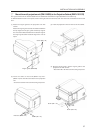
(9) Attach the cover (BNE1012) to the top board of the unit
using the four screws (M5 × 15).
INSTALLATION AND ASSEMBLY
*Drop the screw-lock fluid to screws so as not to loosen.
(4 points)
(8) Check the Focus and readjust if necessary.
Cushion A
(BMR1106)
* Paste after adjusting the
center of the top board to
that of cushion A.
* Paste without cover-
ing the fan.
Cushion B
(BMR1107)
Screws
(M6 × 20)
Unit
Screw (M5 × 15)
Cover
(BNE1012)
Screws
(M6 × 20)