


60
INSTALLATION AND ASSEMBLY
Screen
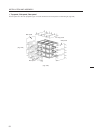
5. SPECIAL INSTALLATION
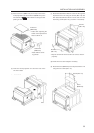
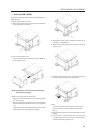
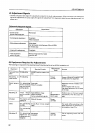
(1) Wall inset
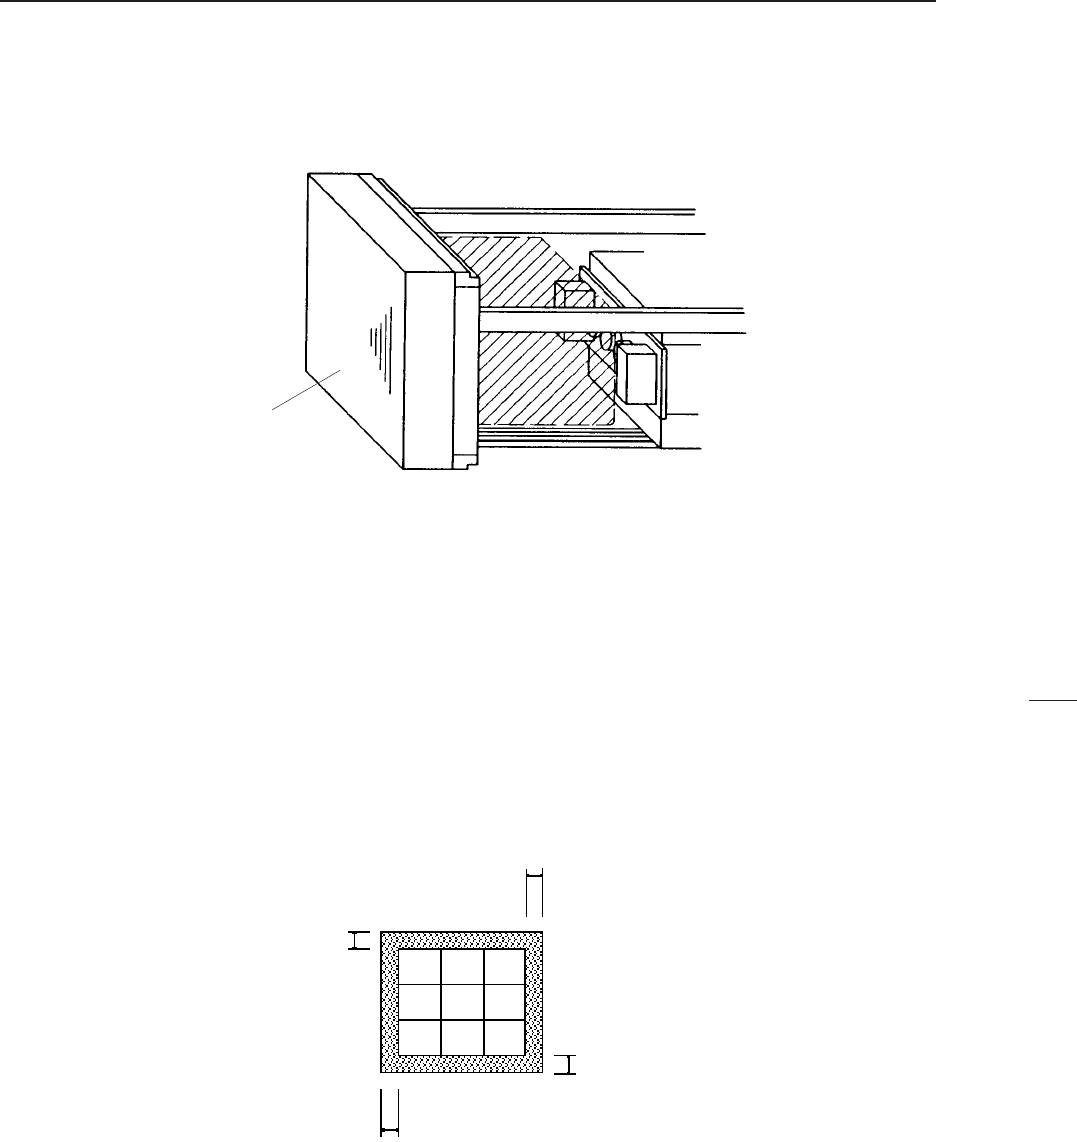
• If removing the screen after installing the system, the person must go behind the screen (diagonally shaded part of the
figure). Therefore when insetting the unit in the wall, careful take this into account before installation.
• If light leaks from the rear space after constructions, place a blind plate over the rear.
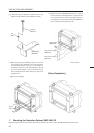
• No one should climb onto the top board. (RMF-V4011/V5011)
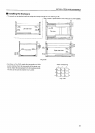
15 mm
15 mm
15 mm
15 mm
(Fig. 3-44)
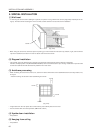
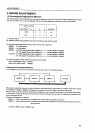
(3) Architrave processing
• When enclosing the screen with a frame, etc., add 15 mm to the dimensions of the assembled screen at the top, bottom, left,
and right.
* Perform framing constructions after assembling the screen.
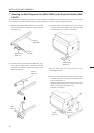
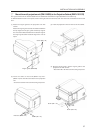
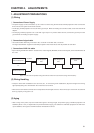
(2) Diagonal installation
• This system cannot be placed facing upwards or downwards and diagonally. Always place it horizontally.
However, Multiprojection unit (RM-V4000NA/V5000NA) alone can be tilted at the up to 45 deg. Installation of special order
screens and cabinets should also become possible in the near future.
• When fixing the screen into the wall, space for placing your hand inside the wall at the top, bottom, right, and left will be
required in addition to the above in order to attach and remove the screen.
(Fig. 3-43)
(4) Upside down installation
• Not possible
(5) Hanging from ceiling
• Not possible