


210
PRO-610HD, PRO-510HD, SD-582HD5, SD-532HD5
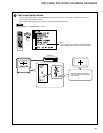
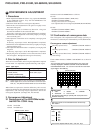
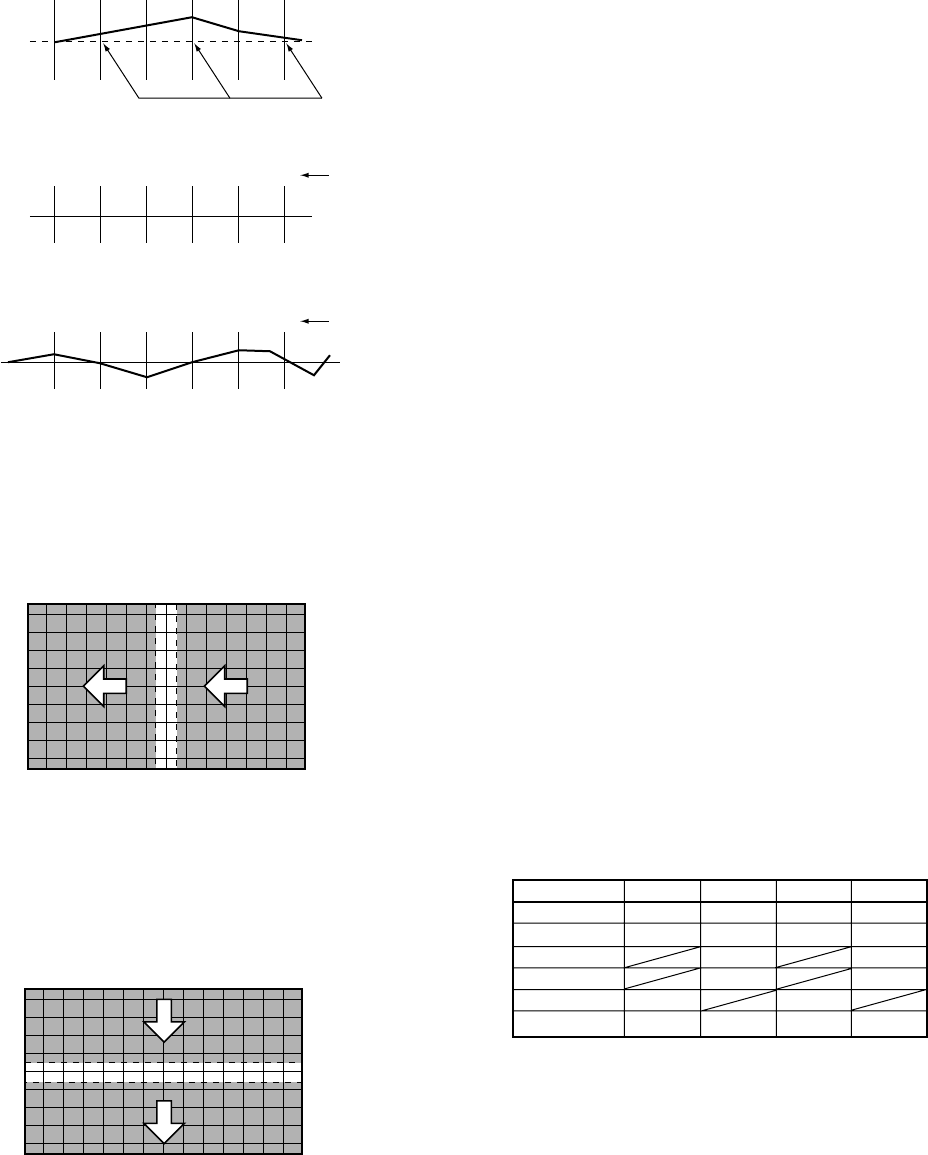
2nd step
Adjust so that the vertical lines become straight, taking care to
preserve proper screen information volume and the linearity.
Adjust the right half of the screen first, then the left half.
(See 3.4.)
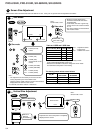
3rd step
Adjust so that the horizontal lines become straight. Adjust the
upper half of the screen first, then the lower half. (See 3.4.)
4th step
Repeat 2nd and 3rd steps to take total balance. Then the adjust-
ment for the green is completed.
To return from the fine adjustment mode to the coarse adjustment
mode, press the MENU key once, then the DOT key.
Note: When the MENU key is pressed to quit MANUAL
CONVERGENCE mode, the display will be unstable for
several seconds. This is because the adjustment data are
being written to the EEPROMs, and is not a malfunction.
Do not perform any operation (power on/off, or pressing
keys on the remote control unit or on the main unit, etc.)
during this period, because doing so may affect your
adjustment data.
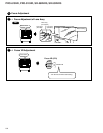
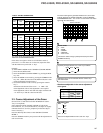
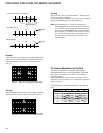
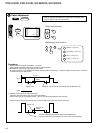
In a case of an error in convergence:
Adjustable points
Bad adjustment:
Good adjustment:
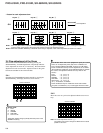
20 25
Adjustment
data
30 -3-5
Adjustment
data
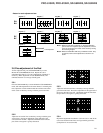
Right half : Adjust from the edge toward the center.
Left half : Adjust from the center toward the edge.
Upper half : Adjust from the edge toward the center.
Lower half : Adjust from the center toward the edge.
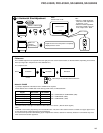
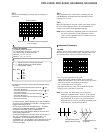
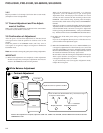
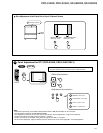
3.5 Coarse Adjustment of the Red
After the green adjustment is completed, quit MANUAL
CONVERGENCE mode by pressing the MENU or MUTING
key, then press the DOT key three times to enter OFFSET
CONVER. MODE 3.
Select adjustment items for RH and RV, and roughly correct
distortion to converge with the green. Adjustment is required for
each screen mode
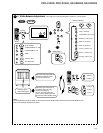
For adjustable items of the red and the blue, see the following
table.
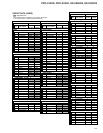
Numeric Key RH RV BH BV
0 STATIC STATIC STATIC STATIC
1 SKEW SKEW SKEW SKEW
4 KEY KEY
6 PIN PIN
7 LIN LIN
8 SIZE SIZE SIZE SIZE