


197
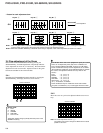
PRO-610HD, PRO-510HD, SD-582HD5, SD-532HD5
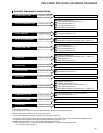
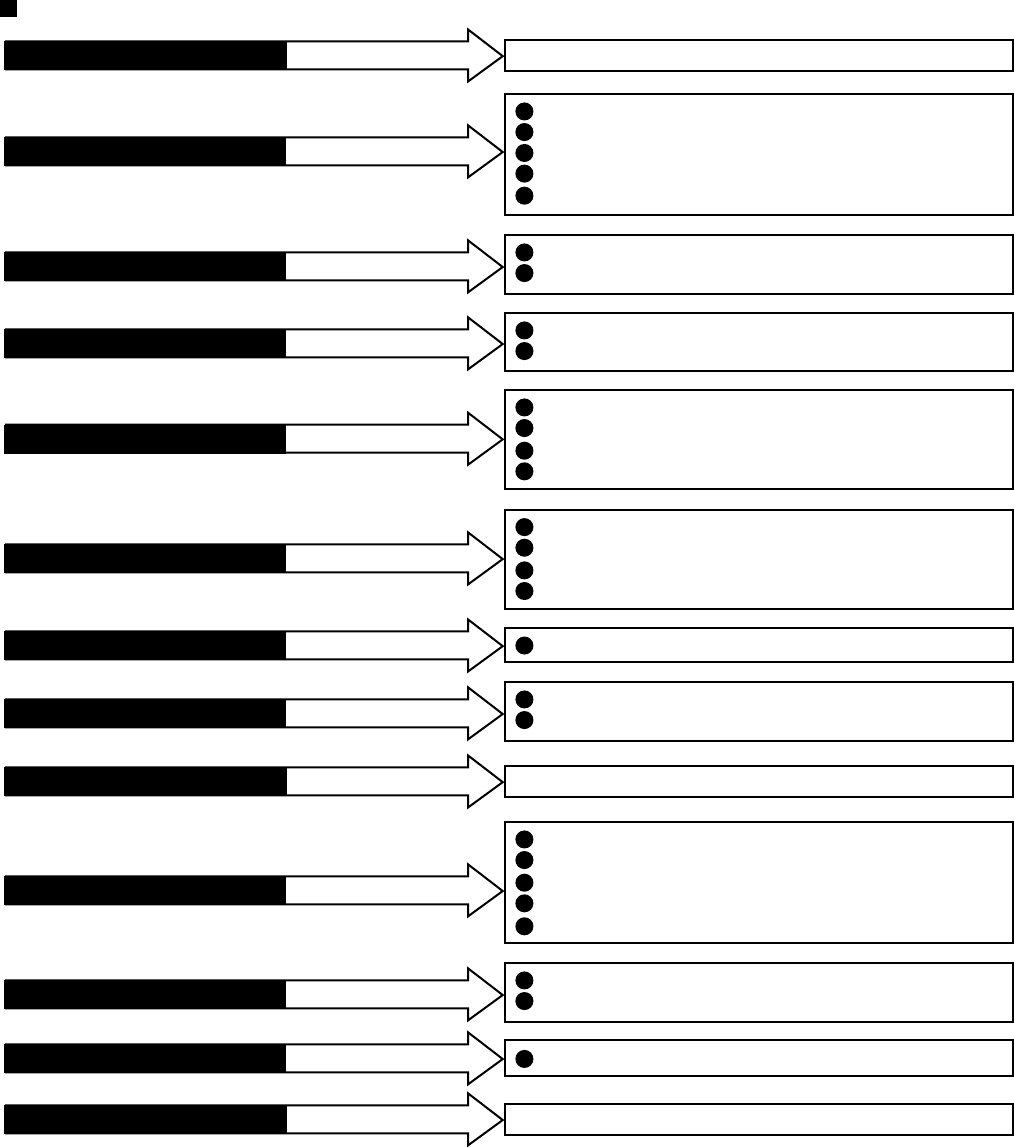
If POWER SUPPLY ASSY
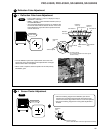
Brightness Adjustment (∗2)
Focus Adjustment (VR1: FOCUS VR) (∗2)
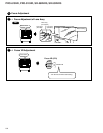
Screen Size Adjustment (∗2)
Convergence Adjustment (∗2)
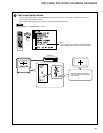
White Balance Adjustment (∗2)
1
3
5
6
7
No adjustment is required
is repaired or replaced
If AV I/O ASSY
No adjustment is required
is repaired or replaced
If OTHER ASSY
No adjustment is required
is repaired or replaced
If DEFLECTION SERVICE ASSY
is repaired or replaced
Brightness Adjustment (∗1)
White Balance Adjustment (Composite STD :∗1, Others :∗2)
1
7
If R, G or B CRT DRIVE ASSY
is repaired or replaced
White Balance Adjustment (∗2)
7
If SIGNAL ASSY
is repaired or replaced
Focus Adjustment (∗2)
Test-cross Position Check (∗2)
Screen Size Adjustment (∗2)
Convergence Adjustment (∗2)
3
4
5
6
If DIGITAL CONV. ASSY
is repaired or replaced
Brightness Adjustment (∗1)
Deflection Yoke Adjustment (∗1)
Focus Adjustment (Lens : ∗2, VR1 Focus VR :∗1)
Convergence Adjustment (∗2)
White Balance Adjustment (Composite STD : ∗1, Others :∗2)
1
2
3
6
7
If CRT ASSY (R, G or B)
is repaired or replaced
Brightness Adjustment (∗2)
White Balance Adjustment (Composite STD : ∗1, Others :∗2)
Panel Adjustment (∗1)
Panel Adjustment for DTV (∗1)
1
7
8
9
If VIDEO ASSY
is repaired or replaced
Screen Size Adjustment (∗2)
Convergence Adjustment (∗2)
5
6
If CONV. AMP ASSY
is repaired or replaced
Test-cross Position Check (∗2)
White Balance Adjustment (∗2)
4
7
If SUB VIDEO ASSY
is repaired or replaced
Focus Adjustment (Lens : ∗1, VR1 Focus VR :∗2)
Convergence Adjustment (∗2)
3
6
If LENS ASSY (R, G or B)
is repaired or replaced
Convergence Adjustment (∗2)
6
If MIRROR and SCREEN
is repaired or replaced
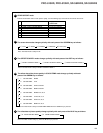
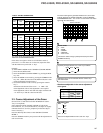
Note :
*1: Readjustment necessary
*2: Turn on the power and confirm the screen. When adjustment deviates, it is readjusted if necessory.
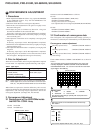
• When the EEPROMs are replaced, check the status of the unit.
• If any IC of the EEPROM is damaged, readjustment of all the items is necessary.
• The necessary adjustment items differ, depending on the assembly or optical part replaced. Check and readjust the adjustment items
corresponding to the replaced assembly or part, following adjustment procedures 1 to 9.
Example: When the DIGITAL CONV. Assy is replaced, perform the following:
3. Focus check/adjustment → 4. Test-cross position check/adjustment → 5. Screen size check/adjustment
→ 6. Convergence check/adjustment
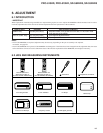
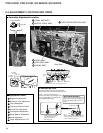
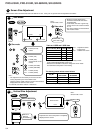
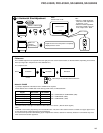
Assembly Adjustment Location Guide