


211
PRO-610HD, PRO-510HD, SD-582HD5, SD-532HD5
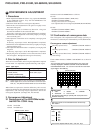
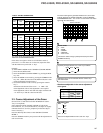
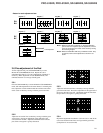
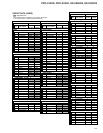
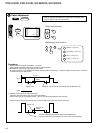
• Pattern for each adjustment item
Key No.
`
STATIC
RH
BH
RV
BV
Key No.
1
SKEW
Key No.
7
LIN
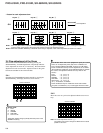
Key No.
`
STATIC
Key No.
1
SKEW
Key No.
4
PIN
Key No.
6
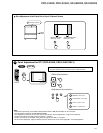
Key No.
8
SIZE
Key No.
8
SIZE
KEY
= Fixed position
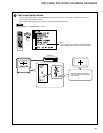
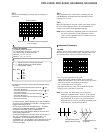
3.6 Fine-adjustment of the Red
To fine-adjust the red, press the SET/ENTER key to enter
MANUAL CONVERGENCE mode. Repeat the coarse
adjustment described in "3.5 Coarse Adjustment of the Red" if
necessary. Make adjustment for each SCREEN mode, and
eliminate distortion to converge with the green.
3.6.1
Press the SET/ENTER key to enter MANUAL CONVERGENCE
mode, and make adjustment in the same manner as with the green.
First, adjust the vertical and horizontal the red lines at the center
of the screen so that they converge with the green center lines.
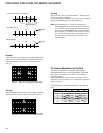
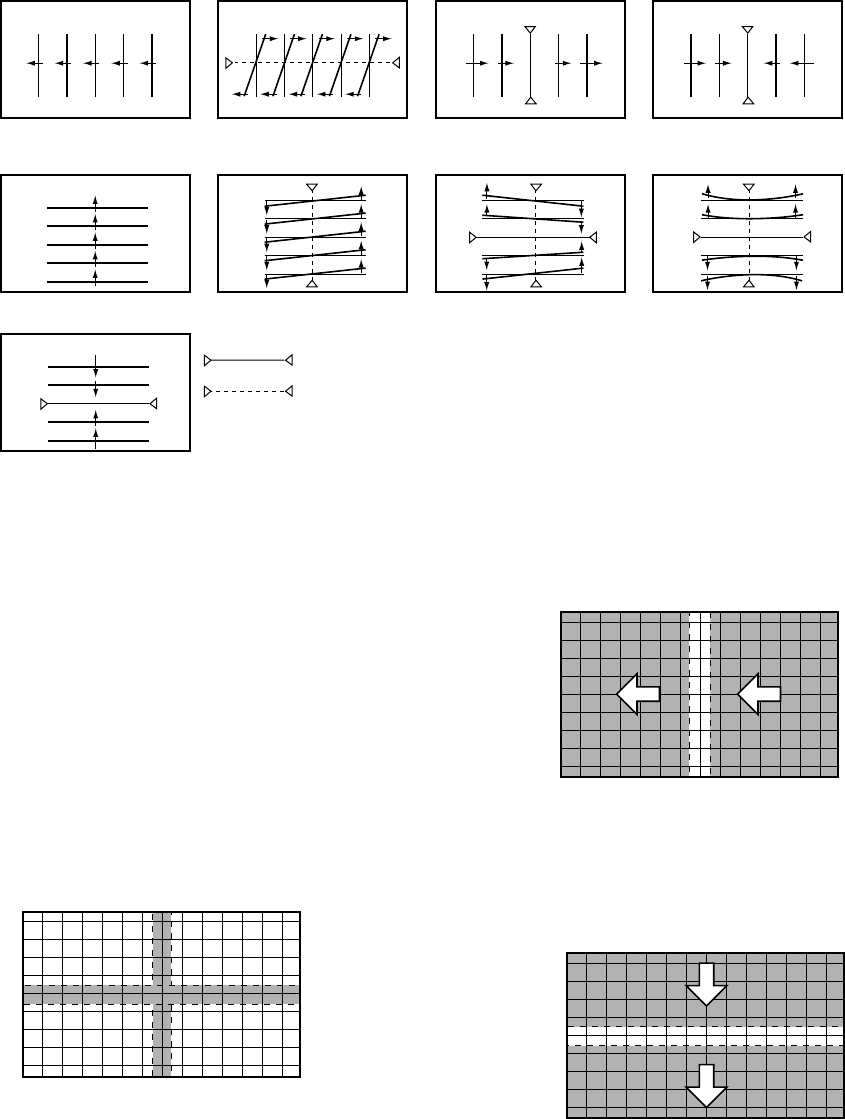
3.6.2
Adjust the red vertical lines so that they converge with the green
vertical lines. Proceed to adjustment of the right half of the
screen, then the left half. Adjustment should be done from the
part where convergence is greatly dislocated.
3.6.3
Adjust the red horizontal lines so that they converge with the
green horizontal lines. Proceed to adjustment of the upper half of
the screen, then the lower half. Adjustment should be done from
the part where convergence is greatly dislocated.
3.6.4
Repeat the adjustments described in 3.6.2 and 3.6.3 so that all the
red vertical and horizontal lines converge with the green lines.
(Completion of one screen mode)
Note 1: When the red CRT is replaced, or when the deflection
yoke for the red is replaced, prior to adjustment, tune the
center of the image to the center of the screen by turning
the centering magnet.
Note 2: When the CONVER. AMP Assy or DIGITAL CONV. Assy
is replaced, make coarse adjustment as shown in 3.5
above.