


2-8 Pitney Bowes DA500/DA550 Operator Guide
2 • Setting Up the DA500/DA550 Printer
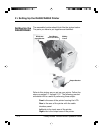
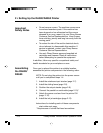
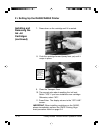
Assembling
the DA500/
DA550
(continued)
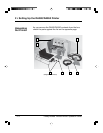
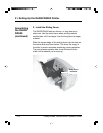
2. Install the Sliding Fence
The DA500/DA550 has two fences—a long one and a
short one. Use the short fence when printing material
smaller than a #10 envelope. Use the long fence for larger
material.
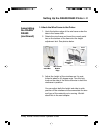
Slide the square edge of the sliding fence into the slots on
the frame slide as shown below. The fence fits snugly in
the slots to ensure accurate positioning during operation.
The next chapter explains how to set the fence to the
width of the material you're running.
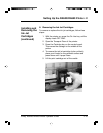
Sliding Fence
in Position