Changing Destination Names
91
This name can be changed to something more meaningful using
the built-in HTML forms. To do this:
1. Load a Web browser on your Windows station and direct it to
the URL:
http://NICIPaddress/destConf.html
(e.g., http://192.75.11.9/networkConf.html).
NOTE: If prompted for a “User ID” and password first, type in root
for the ID and press ENTER at the password prompt (since
there is no password by default).
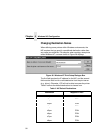
2. At the “Print Path Configuration” HTML form that displays,
select a destination link from the top of the page to bring up the
appropriate destination form. By default, you should see a line
near the top of the form showing the destinations listed in
Table 3.
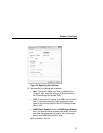
3. Once the desired destination HTML form displays, highlight the
“Name” field and type in the new name for this destination.
4. Click on the SUBMIT button when done and physically repower
the print server to make the new setting take effect.


