4-6 Items You Can Set Using the Driver
Chapter 4 More Advanced Operations
58
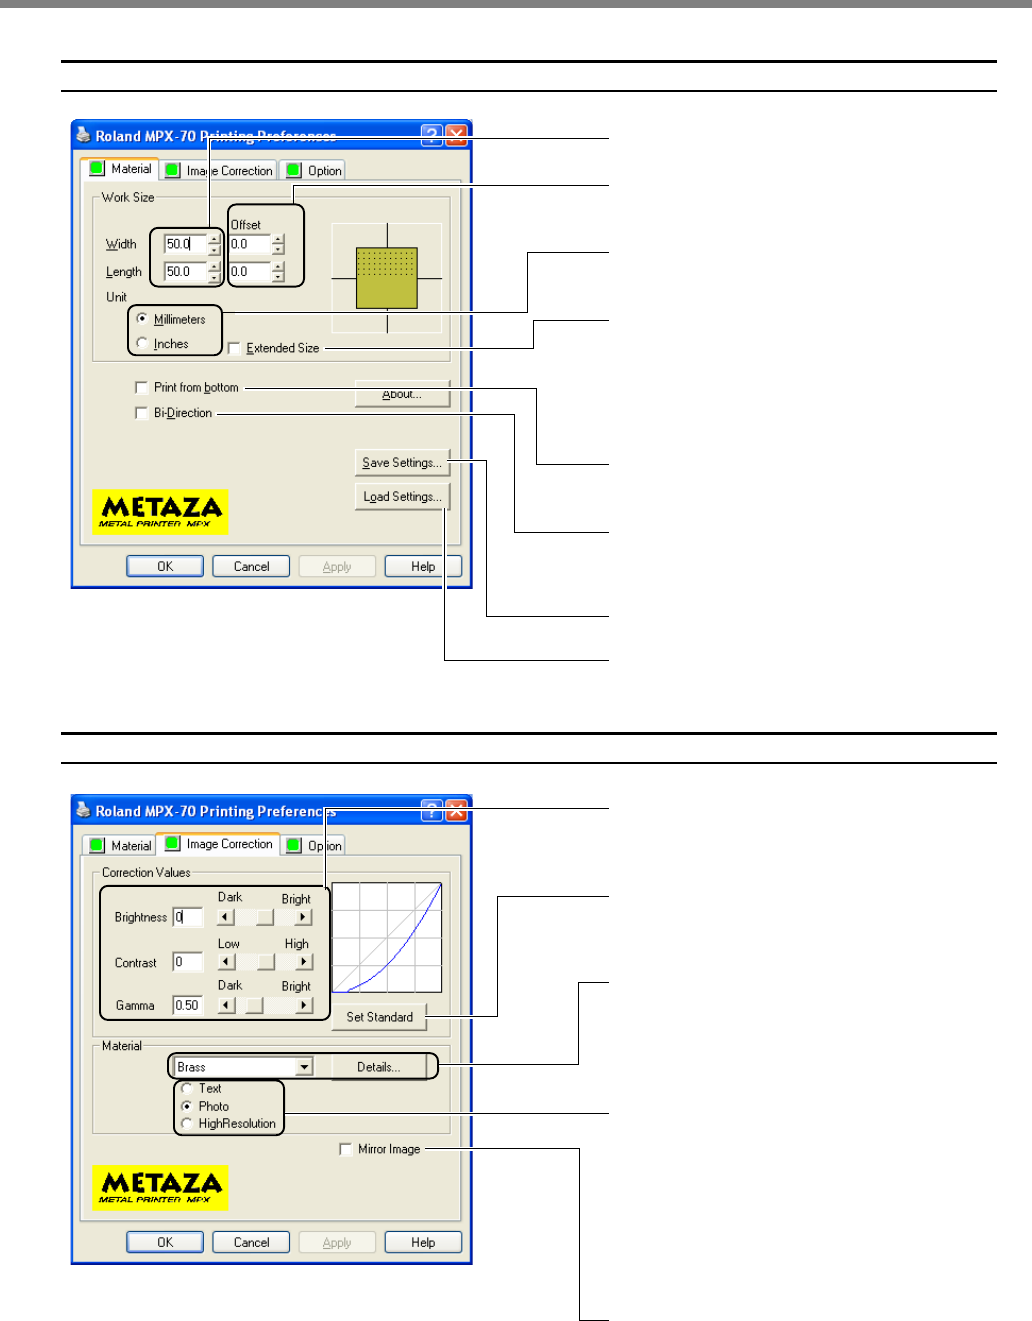
Material Tab
Image Correction Tab
Select this when you want to speed up printing times.
Note, however, that printing quality may be slightly
reduced.
To view the image during printing while printing is in
progress, make sure this is selected.
This loads driver settings saved in a file.
This saves the driver settings in a file.
This corrects misalignment of the center point.
☞p 70 "Adjusting the Location of the Machine's Origin Point"
Enter the size of the printing area.
This expands the printing area (this can be set up to a
maximum of 80 x 80 mm (3-1/8 x 3-1/8 in.).
However, note that when printing is performed in an
expanded area (that is, outside an area of 50 x 50 mm
(1-15/16 x 1-15/16 in. )), then depending on the mate-
rial and the image, unevenness in darkness may occur.
This chooses the units of measurement for the width
and length.
This chooses the composition of the material to print.
The optimal striking force for printing the composition
is set.
To fine-tune the striking force, click [Details].
☞p 72 "Adjusting the Striking Force to Match the Material"
This selects the printing mode.
When you're printing an image with clearly defined
outlines, such as text, then select [Text]. When you're
printing an image that contains gradations, such as a
photograph, then select [Photo]. When you want to cut
even small text and intricate patterns attractively, choose
[High Resolution]. Note that the printing time when
you select [High Resolution] takes approximately twice
as long as with [Photo].
This prints a mirror image of the printing image.
This returns the corrected image values to the initial
values before correction (brightness = 0, contrast = 0,
and gamma = 0.5).
This performs adjustment when the printing results are
not what you intended.
☞p 74 "The image is unattractive."


