Faxing_51
faxing
The fax feature is available only on the CLX-6200FX, CLX-6210FX, CLX-6240FX. This chapter gives you information about using
your machine as a fax machine.
This chapter includes:
• Sending a fax
• Receiving a fax
• Other ways to fax
• Fax setup
SENDING A FAX
Setting the fax header
In some countries, you are required by law to indicate your fax number on
any fax you send. The Machine ID, containing your telephone number and
name or company name, will be printed at the top of each page sent from
your machine.
1. Press Menu () until System Setup appears on the bottom line of the
display and press OK.
2. Press OK when Machine Setup appears.
3. Press OK when Machine ID appears.
4. Enter your name or the company name using the number keypad. You
can enter alphanumeric characters using the number keypad, and
include special symbols by pressing the 0 button. For details on how to
enter alphanumeric characters, see page 29.
5. Press OK to save the ID.
6. Press the left/right arrow until Machine Fax No. appears and press OK.
7. Enter your fax number using the number keypad and press OK.
8. Press Stop/Clear to return to ready mode.
Adjusting the document settings
Before starting a fax, change the following settings according to your
original’s status to get the best quality.
Resolution
The default document settings produce good results when using typical
text-based originals. However, if you send originals that are of poor
quality, or contain photographs, you can adjust the resolution to produce
a higher quality Fax.
1. Press Resolution.
2. Press Resolution or the left/right arrow until the option you want
appears.
3. Press OK to save your selection.
Recommended resolution settings for different original document types
are described in the table below:
Darkness
You can select the default contrast mode to fax your originals lighter or
darker.
1. Press Fax.
2. Press Menu () , and then OK when Fax Feature appears on the
bottom line of the display.
3. Press OK when Darkness appears.
4. Press the left/right arrow until the option you want appears and press
OK.
5. Press Stop/Clear to return to ready mode.
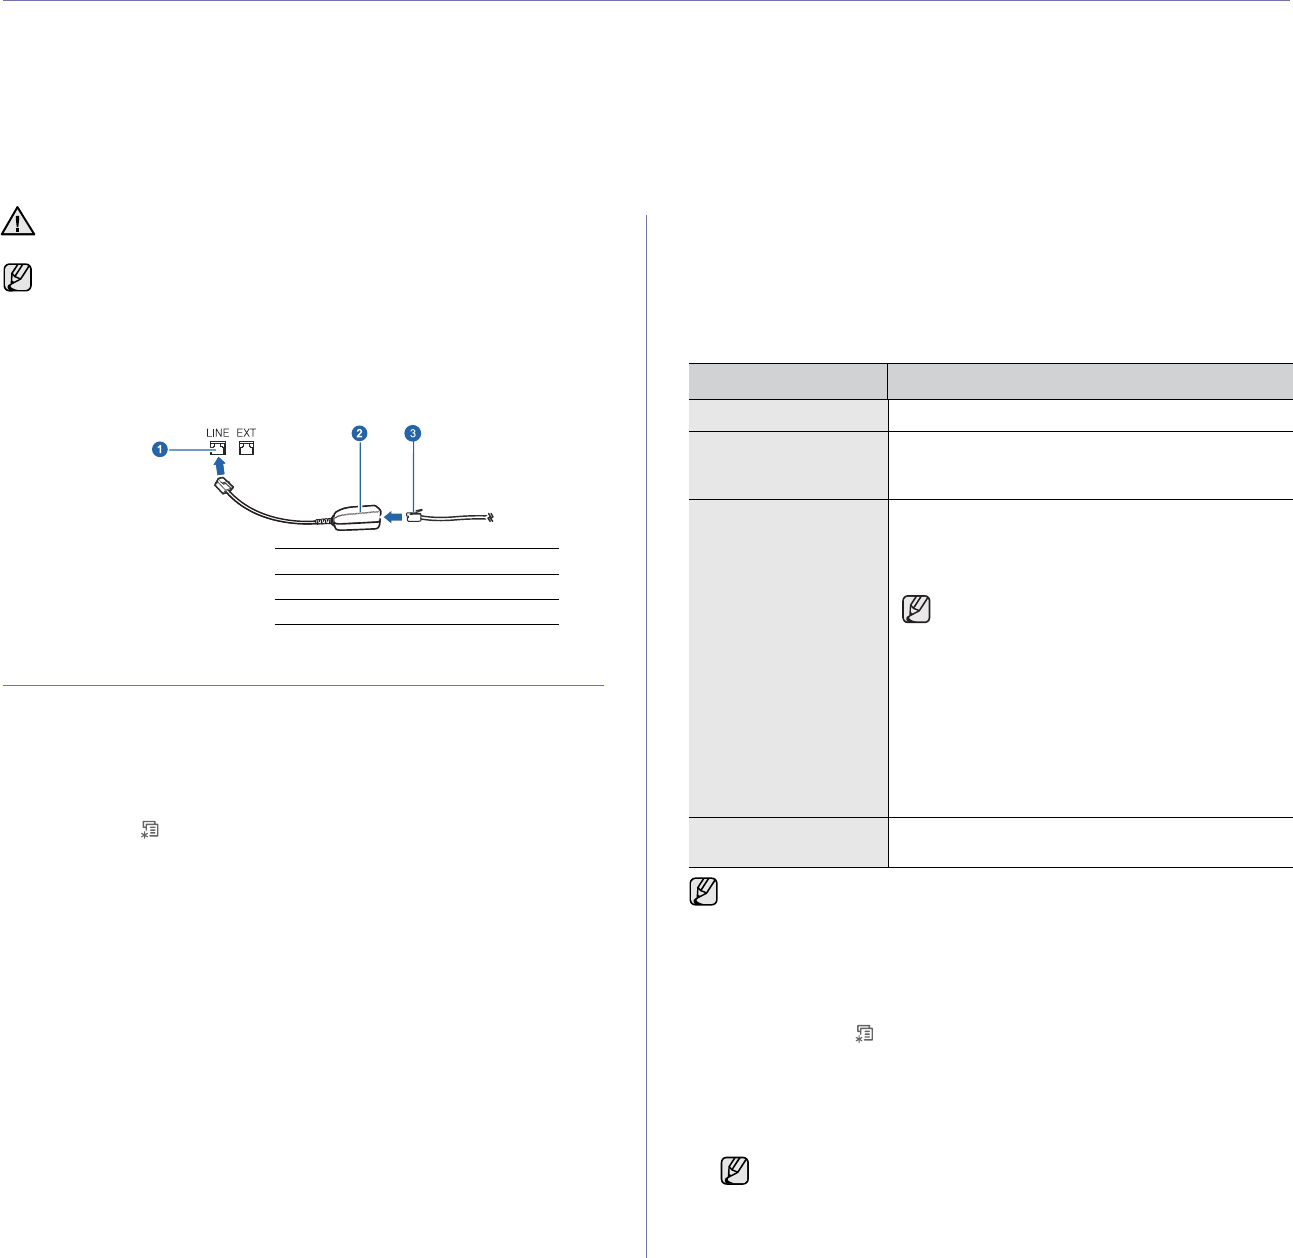
You cannot use this machine as a fax machine via the internet
phone.
We recommend you to use traditional analog phone services (PSTN:
public switched telephone network) when connecting telephone lines
to use Fax. If you use other Internet services (DSL, ISDN, VolP), you
can improve the connection quality by using the Micro-filter. The
Micro-filter eliminates unnecessary noise signals and improves
connection quality or Internet quality. Since the DSL Micro-filter is not
provided with the machine, contact your Internet Service provider for
use on DSL Micro-filter.
1 Line port
2 Micro filter
3 DSL modem / Telephone line
MODE RECOMMENDED FOR:
Standard Originals with normal sized characters.
Fine Originals containing small characters or thin
lines or originals printed using a dot-matrix
printer.
Super Fine Originals containing extremely fine detail. Super
Fine mode is enabled only if the machine with
which you are communicating also supports the
Super Fine resolution.
• For memory transmission, Super Fine
mode is not available. The resolution
setting is automatically changed to
Fine.
• When your machine is set to Super
Fine resolution and the fax machine
with which you are communicating does
not support Super Fine resolution, the
machine transmits using the highest
resolution mode supported by the other
fax
machine.
Photo Fax Originals containing shades of gray or
photographs.
The resolution setting is applied to the current fax job. To change the
default setting, see page 57.
The darkness setting is applied to the current fax job. To change
the default setting, see page 57.


