


94 _Installing accessories
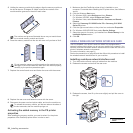
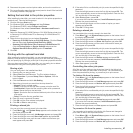
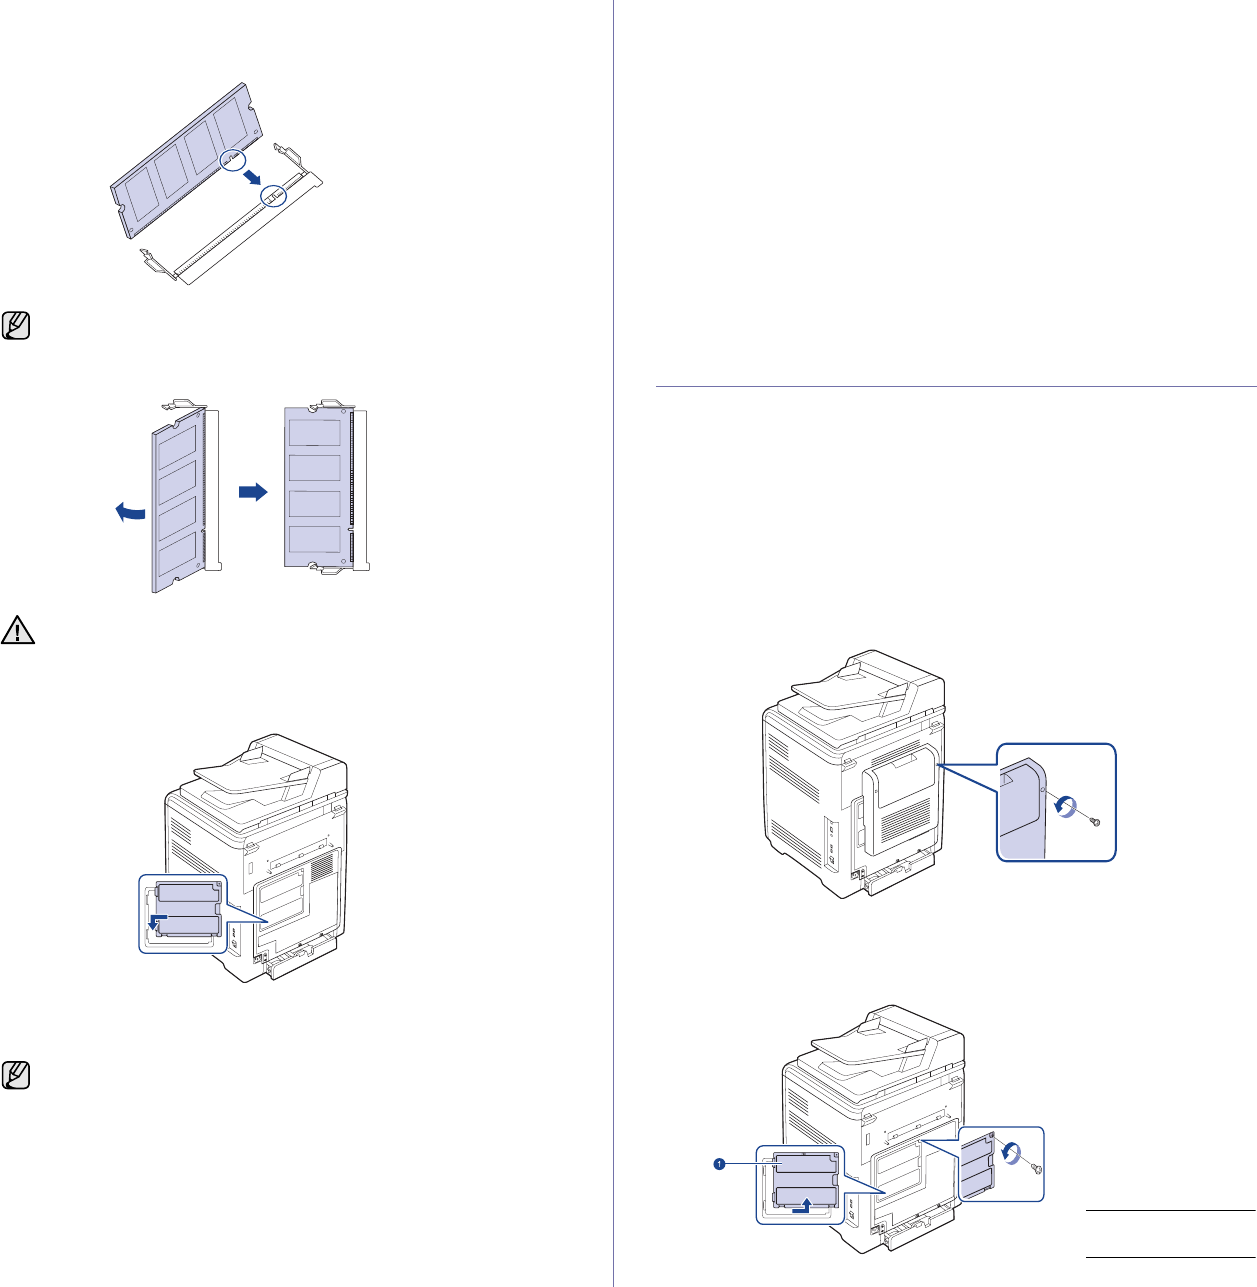
5. Holding the memory module by the edges, align the memory module on
the slot at about a 30-degree tilt. Make sure that the notches of the
module and the grooves on the slot fit each other.
6. Press the memory module into the slot with care until you hear a 'click'.
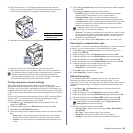
7. Replace the control board cover and fasten the cover with the screws.
8. Replace the rear cover and fasten the cover with the screw.
9. Reconnect the power cord and printer cable, and turn the machine on.
Activating the added memory in the PS printer
properties
After installing the memory module, you need to select it in the printer
properties of the PostScript printer driver in order to use it.
1. Make sure that the PostScript printer driver is installed on your
computer. For details about installing the PS printer driver, see Software
secion.
2. Click the Windows Start menu.
3. For Windows 2000, select Settings and then Printers.
For Windows XP/2003, select Printers and Faxes.
For Windows Vista, select Control Panel > Hardware and Sound >
Printers.
4. Select the Samsung CLX-6200 Series PS or Samsung CLX-6240
Series PS printer.
5. Click the right mouse button on the printer icon and select Properties.
6. For Windows 2000/XP/2003/Vista, select Device Settings.
7. Select the amount of memory you installed from
Printer Memory
in the
Installable Options
section.
8. Click OK.
USING A WIRELESS NETWORK INTERFACE CARD
The CLX-6200ND, CLX-6210FX and CLX-6240FX is equipped with a
network interface which allows you to use your machine on a network. You
can also purchase a wireless network interface card to enable the use of the
printer in wireless network environments
For order information, see page 91
Review the precautions on page 93 and then follow this procedure to install
the wireless network interface card in your machine.
Installing a wireless network interface card
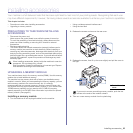
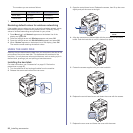
1. Turn the machine off and unplug all cables from the machine.
2. Release the screws and remove the rear cover.
3. Release the screws, then lift up the cover slightly and pull the cover to
the right.
The notches and grooves illustrated above may not match those
on an actual memory module and its slot.
Do not press the memory module strongly or the module may be
damaged. If the module does not seem to fit into the slot properly,
carefully try the previous procedure again.
To release the memory module, pull the two tabs on the sides of
the slot outwards, then the module springs out.
1 Control board
cover