8.5 <
Scanning>
Scanning to an SMB server
You can scan an image and then send it to an SMB server. You need to
set up parameters for access to SMB servers from SyncThru™ Web
Service. See page 8.3.
Before scanning, you can set the scan options for your scan job. See
page 8.5.
1 Make sure that your machine is connected to a network.
2 Load originals face up into the ADF or place a single original on the
scanner glass.
For details about loading an original, see page 5.1.
3 Press Scan/Email.
4 Press the Scroll buttons until Scan to SMB appears on the bottom
line of the display and press OK.
5 Enter the user ID and press OK.
6 Enter the password and press OK.
7 Press the Scroll buttons until the SMB server you want appears and
press OK or Start.
8 Press the Scroll buttons until the file format you want appears and
press OK or Start.
The machine begins scanning and then sends the file to the
specified server.
Changing the settings for each scan job
Your machine provides you with the following setting options to allow you
to customize your scan jobs.
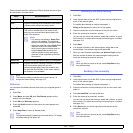
• Scan Size: Sets the image size.
• Original Type: Sets the original document’s type.
• Resolution: Sets the image resolution.
• Scan Color: Sets the color mode.
• Scan Format: Sets the file format in which the image is to be saved. If
you select TIFF or PDF, you can select to scan multiple pages.
Depending on the selected scan type, this option may not appear.
To customize the settings before starting a scan job:
1 Press Scan/Email.
2 Press Menu until Scan Feature appears on the bottom line of the
display and press OK.
3 Press the Scroll buttons until the scan type you want appears and
press OK.
4 Press the Scroll buttons until the scan setting option you want
appears and press OK.
5 Press the Scroll buttons until the desired status appears and press
OK.
6 Repeat steps 4 and 5 to set other setting options.
7 When you have finished, press Stop/Clear to return to Standby
mode.
Changing the default scan settings
To avoid having to customize the scan settings for each job, you can set
up default scan settings for each scan type.
1 Press Scan/Email.
2 Press Menu until Scan Setup appears on the bottom line of the
display and press OK.
3 Press OK when Change Default appears.
4 Press the Scroll buttons until the scan type you want appears and
press OK.
5 Press the Scroll buttons until the scan setting option you want
appears and press OK.
6 Press the Scroll buttons until the desired status appears and press
OK.
7 Repeat steps 5 and 6 to change other settings.
8 To change the default settings for other scan types, press Back and
repeat from step 4.
9 Press Stop/Clear to return to Standby mode.
Setting up Address Book
You can set up Address Book with the email addresses you use
frequently via SyncThru™ Web Service and then easily and quickly
enter email addresses by entering the location numbers assigned to them
in Address book.
Registering speed email numbers
1 Enter your machine’s IP address as the URL in a browser and click
Go to access the web site of your machine.
2 Click Machine Settings, E-mail Setup and Local Address Book.
3 Click Add.
4 Select a location number and enter the user name and e-mail
address you want.
5 Click Apply.
Note
You can also click Import and obtain your address book
from your computer.


