CALENDAR
ALL MODELS
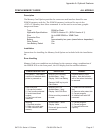
The Calendar Option allows the date and time to be maintained in the local printer
rather than using the system clock. It consists of an integrated circuit module
containing the clock components and battery and plugs into a socketon the main pcb
assembly. A qualified technician should perform the upgrade as it requires
modifications to the main PCB assembly. Please call SATO Technical Support if you
need to add this option to an existing printer in the field.
PLUG-IN INTERFACE MODULES ALL MODELS
The CL Series “e” printers have user changable Plug-In Interface Modules. The
Interface Module is accessible from the Rear Panel and is retained by two
screws. Use the following procedure to replace an interface molule.
1. Turn power off both the printer and the host and remove the power and interface
cables.
WARNING: Never connect or disconnect interface cables (or use a switch box) with
power applied to either the host or the printer. This may cause damage to the
interface circuitry and is not covered by warranty.
2. Remove the two Interface Module Retaining Screws.
3. Grasp the Interface Module and pull it out of the connector.
4. Place the new Interface Module in the slot and press inward firmly until it is
properly seated.
5. Replace the two Interface Card Retaining Screws.
6. If the new Interface Module is for a serial interface, set DSW1 for the proper
operation.
7. Connect the interface cable to the connector.
SATO CL Series “e” Printers PN 9001074 Rev. B Page A-9
Appendix A: Optional Features


