


Unit 6: Maintenance
SATO XL400-410e Operator Manual PN 9001135A Page 6-5
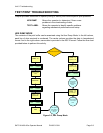
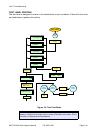
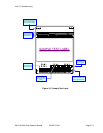
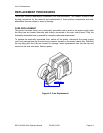
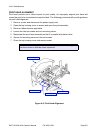
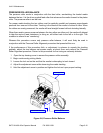
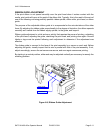
RIBBON ROLLER REPLACEMENT
The ribbon roller is a high wear component due to the ribbon medium treading on its surface. The
ribbon roller is the only roller approved for replacement by the operator. For all other roller
replacements, contact a service representative.
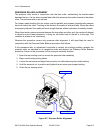
1 Switch off the printer and disconnect the power supply cord.
2 Remove the ribbon stock from the printer.
3 Remove the screw securing roller clamp to the frame.
4 Remove the roller clamp and lift away defective ribbon roller assembly.
5 Install the replacement ribbon roller assembly and apply clamp.
6 Secure the ribbon roller assembly and the clamp to the printer frame.
7 Reconnect power supply cord and test cycle.
Figure 6-4, Ribbon Roller Replacement
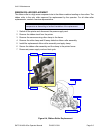
NOTE: Observe and remember the sequence and orientation of tribbon roller
components as dismantling to facilitate installation of the replacement.
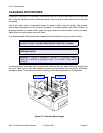
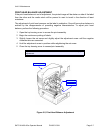
Top Housing Cover
A/C Power Connector
Power Switch
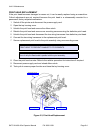
Clamp Ribbon Roller Assembly
Clamp Screw