Replacing the Photoconductor Unit
13
1
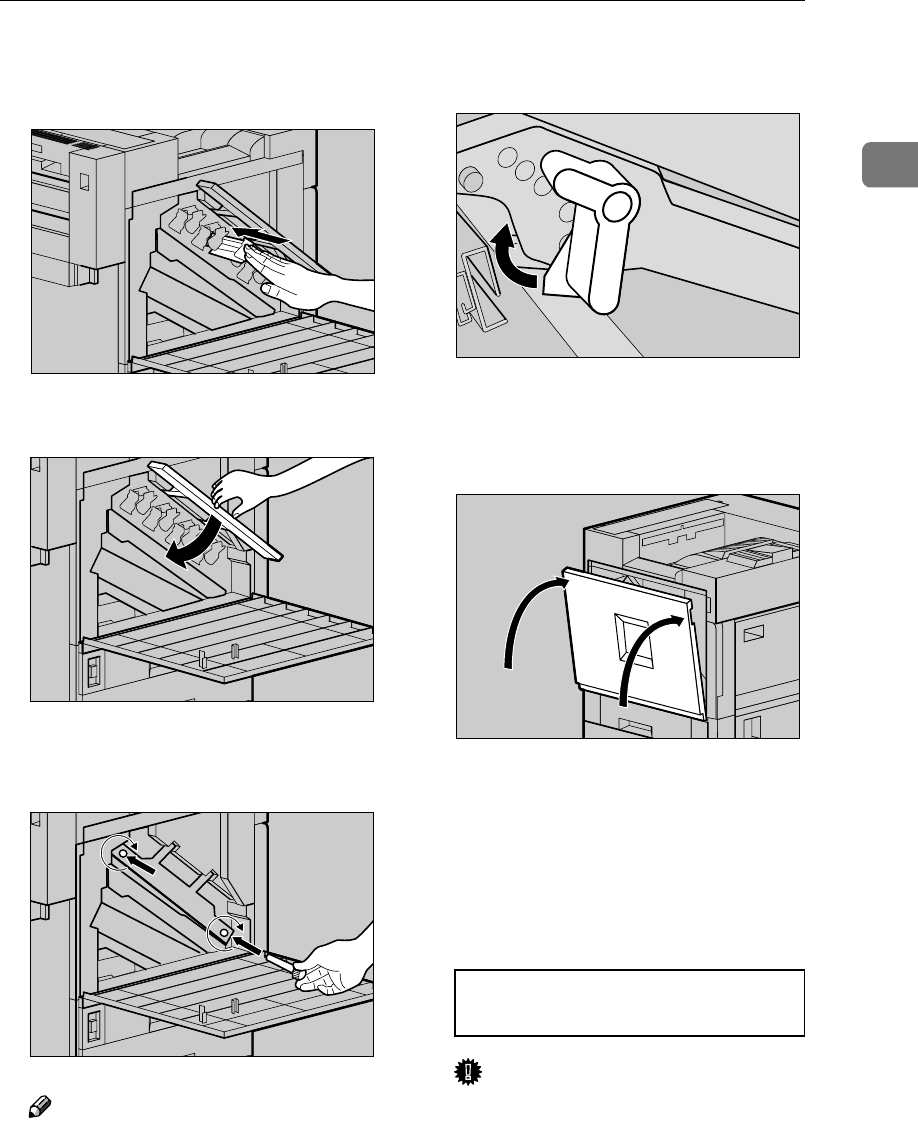
E Remove the cover and push in
the Photoconductor Unit until
it stops.
I
Lower the inner cover slowly.
J
Tighten two screws using provid-
ed screwdriver.
Note
❒ Be sure to return the provided
screwdriver to its original posi-
tion on the back of the front cov-
er.
K
Turn the light brown lever clock-
wise.
L
Close the front cover slowly by
pushing the two areas on the left
and right.
M
Plug in the power cable and turn
on the power switch.
The following message appears on
the panel display. The printer
starts calibration. Please wait until
it stops.
Calibrating...
Important
❒ Do not turn off the power
switch during calibration to
avoid a printer malfunction.
ZDJX702E
ZDJH018J
ZDJH019J
ZDJH020E
ZDJH041J


